How to Create a Stunning 4x6 Photo Collage with Ease

A 4x6 photo is one of the most popular photo sizes. It becomes even more versatile when used to create a 4x6 photo collage!
In this post, we will provide easy-to-follow steps for creating a 4" x 6" collage. If you're interested in making a collage of a different size, here's a tutorial on how to make a collage of any size you want.
Here's what you'll need to create a 4x6 photo collage:
- A few photos saved on your computer (either a Mac or a Windows PC). These images will be used for the collage.
- TurboCollage software. If you haven't downloaded it yet, you can quickly get it and install it from here.
- A 4x6 photo paper sheet if you plan to print your collage.
- A printer capable of printing in 4x6 size if you intend to print your collage.
Now, let's go through the steps to create your photo collage!
Create a 4x6 Photo Collage
The initial step in creating a photo collage with TurboCollage is to define the collage size.
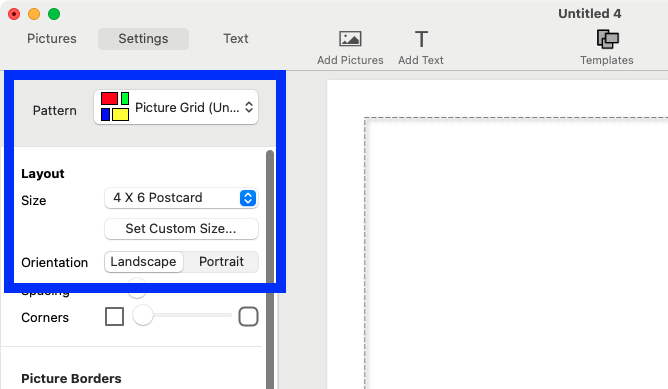
Setting the Collage Size to 4x6
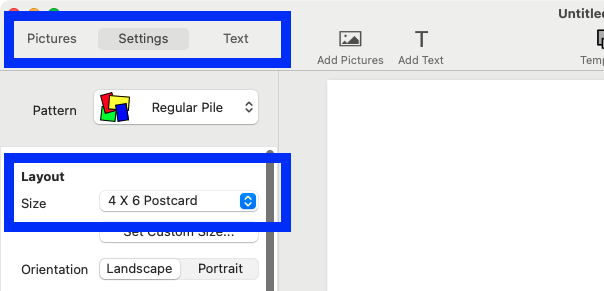
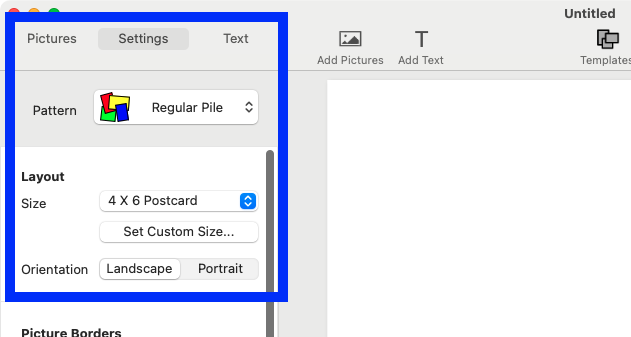
Open TurboCollage and go to the Layout section under the Settings tab. From the Size drop-down menu, select "4x6."
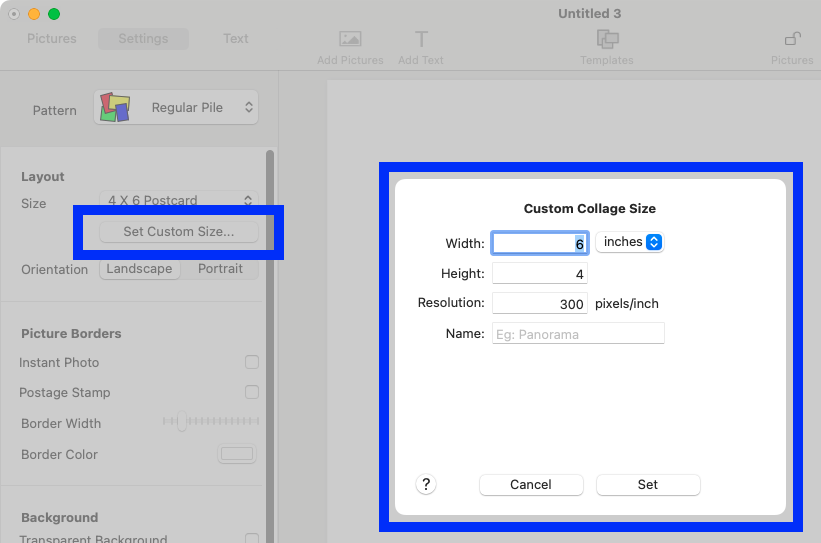
Alternatively, you can set the size by specifying its dimensions directly. To do this, click the "Set Custom Size..." button in the Layout section.
The dimensions for a 4x6 size are as follows:
- 101.6 mm x 152.4 mm
- 10.16 cm x 15.24 cm
- 4 inches x 6 inches
If you set the resolution to 300 pixels per inch, the corresponding dimensions in pixels will be 1200 px x 1800 px. This is calculated by multiplying the size in inches by the resolution (4 inches * 300 for width and 6 inches * 300 for height).
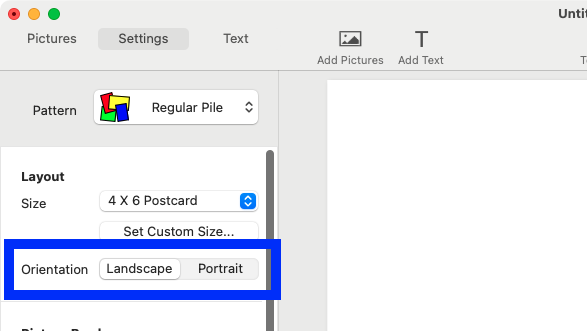
You can create your collage in either Landscape orientation (6 inches wide and 4 inches high) or Portrait orientation (4 inches wide and 6 inches high).
Now that we have set the collage size, we will make a few example collages:
How to Make a 4x6 Photo Grid Collage

A 4x6 photo grid. The size of this image has been reduced for fast downloading. Download original.
Follow these steps to create a 4x6 photo grid collage:
1. Set the Collage Size: Start by setting the collage size to 4x6, as described above.
2. Select Picture Grid Pattern: Next, choose the "Picture Grid" pattern and specify the number of rows and columns. For this example, we will create a landscape collage with three rows and four columns for a total of 12 photos, but feel free to choose any combination of rows and columns that suits your design.

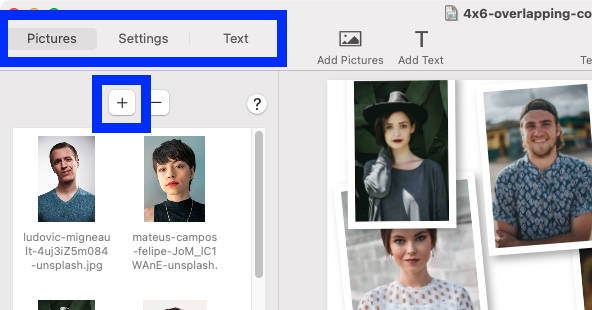
3. Add Pictures: Go to the Pictures tab and click the "Add Pictures" button to include photos in your collage. The software will automatically fill the grid with the images you have added.

4. Customize Your Layout: Personalize your collage in various ways to make it unique. You can move photos to different cells, crop images within their cells, add shadows to pictures, and select a background colour.
Here's a detailed tutorial on how to make a photo grid collage.
5. Include Text (Optional): You can also add a text message to your collage if desired.
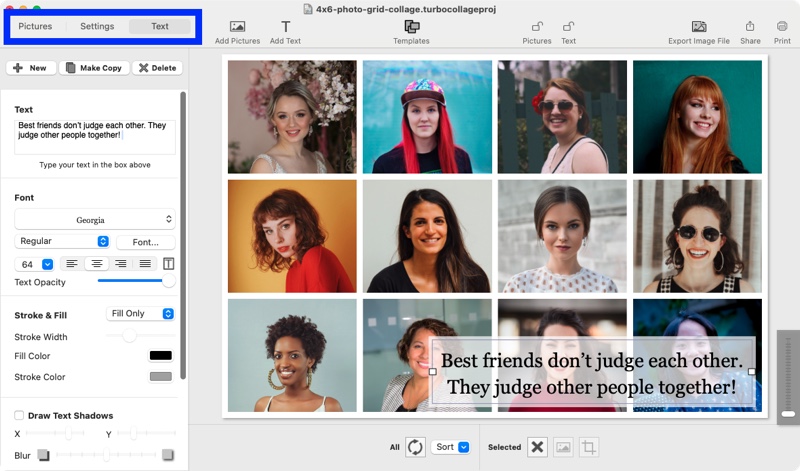
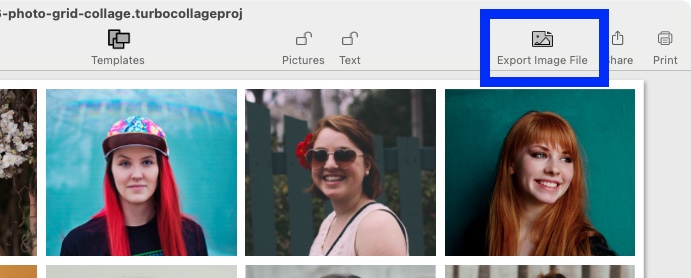
6. Export Your Collage: Once satisfied with your design, export the collage as a JPG, PNG, or TIFF image to share with friends or print on a 4x6 photo paper sheet.
Enjoy creating your collage!
Tweet This 4x6 Picture Collage Making MethodHow to Create a Random 4x6 Photo Collage

A 4x6 photo grid. The size of this image has been reduced for fast downloading. Download original.
1. Set the Collage Size: Configure the size to 4x6 as shown above.
2. Open TurboCollage: Launch the software and choose the "Picture Grid (Unequal)" pattern for your collage.
3. Add Photos: Import several of your favourite images into the program. You can choose as few or as many as you like! TurboCollage will automatically generate a random photo grid for you.
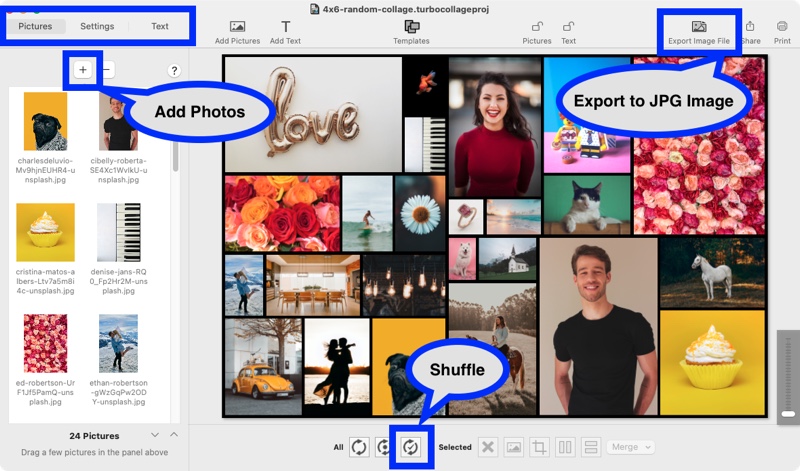
4. Shuffle the Layout: Feel free to shuffle the layout multiple times until you find a design you like.
5. Export Your Collage: Once satisfied with the design, export the finished collage in JPG, PNG, or TIFF file formats. This allows you to print or share it digitally with friends and family.
Tweet This 4x6 Collage Making MethodHow to Create a 4x6 Overlapping Collage

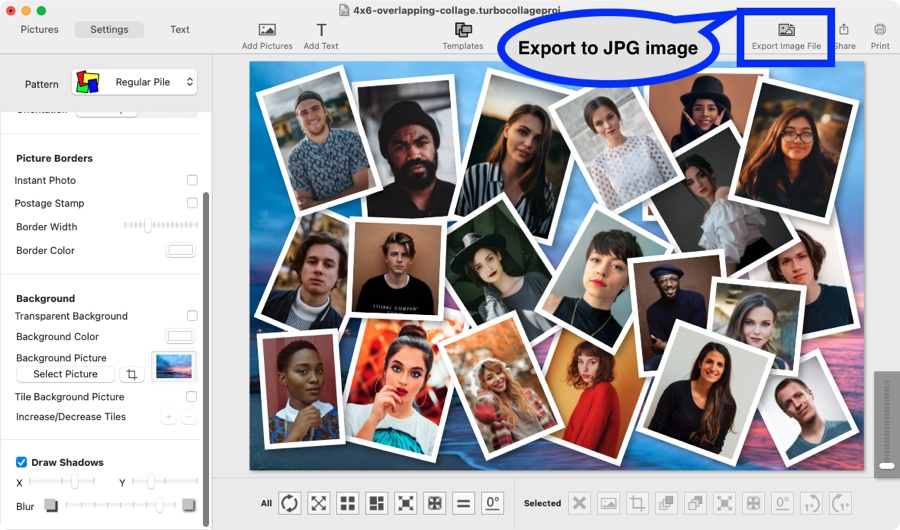
A 4x6 paper size overlapping collage in landscape orientation. The size of this image has been reduced for fast downloading. Download original.
1. Set the Collage Size: Begin by setting the dimensions of your collage to 4x6 inches, as detailed in the instructions above.
2. Choose a Collage Pattern: Select the "Regular Pile" collage pattern for the overlapping design.
3. Add Photos: Import your chosen photos into the collage application. TurboCollage will automatically arrange the images to overlap, giving the appearance of randomly placed printed photos.
4. Customize Your Layout: Adjust your collage by moving the photos around, resizing them (making them smaller or larger), or rotating them as desired. You can also change the layering of the images by bringing certain pictures to the front or sending others to the back.
For more guidance, refer to the detailed tutorial on creating overlapping photo collages.
5. Export Your Collage: Once you're satisfied with the design and layout of your collage, export it as a JPG file. This format is perfect for both printing and sharing with others.