Bring Your Photos to Life With Stunning Circle Collages

Have you stumbled upon a neat circle photo collage on Facebook or Instagram but didn't want to ask how it was made for fear of looking like a design amateur?
Are you a seasoned design expert tired of spending hours perfecting round collages in Photoshop?
Look no further! Today we'll learn how to create a circle collage with TurboCollage - your easy circle collage maker.
Not got tons of experience with design software?
Don't worry. We've designed this guide to be easy to follow whether you're a design pro or just starting out.
The best part about making a circle collage using TurboCollage is the flexibility to customize your design to meet your exact goals. For example, you have the freedom to place an unlimited number of circles in any arrangement that makes sense to you. What's more, you can size your circles as small or as large as you wish!
Why Create a Circle Collage?
Questions like these are always tricky to answer because the intuitive response is "because they look good." And while that's true, there is some science behind why certain things look visually appealing and others don't. The circle is a timeless and classic shape with a strong presence in graphic design, and for a good reason. With their never-ending line, circles evoke a sense of movement and wholeness that draws the eye in. Essentially, circles are typically seen as a softer, friendlier shape in design, and this is why they're one of the most popular choices for logos.
Three Types of Circle Collage
Before exploring how to create a circle collage, let's distinguish between the three types of circle photo arrangements, as illustrated below:
1. Circle photo collage made from unequal circles


2. Circle photo collage made with equal circles placed in a regular pattern
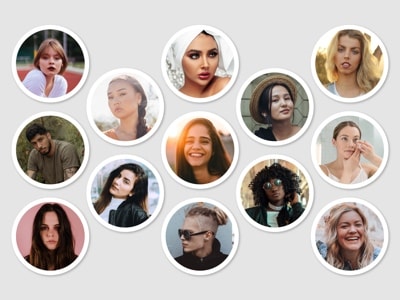

As you can see, the samples on the right make a circle shape by arranging many smaller photos in different ways. If you're looking to create this kind of circle collage, you'll need to use our FigrCollage shape collage software.
But if you're looking to create a round collage, you're in the right place.
Ready to get started on creating an incredible circle collage? Before we begin, you'll need to download and install TurboCollage. The process is simple and fast, taking only a minute or less.
Make a Circle Photo Collage with Unequal Photos Positioned Randomly

Okay, so you've downloaded your circle photo maker software. What next? In this section, we'll dive into how to make a circle photo collage like the example above, with photos positioned and sized just as you want.
Step 1: Getting Started
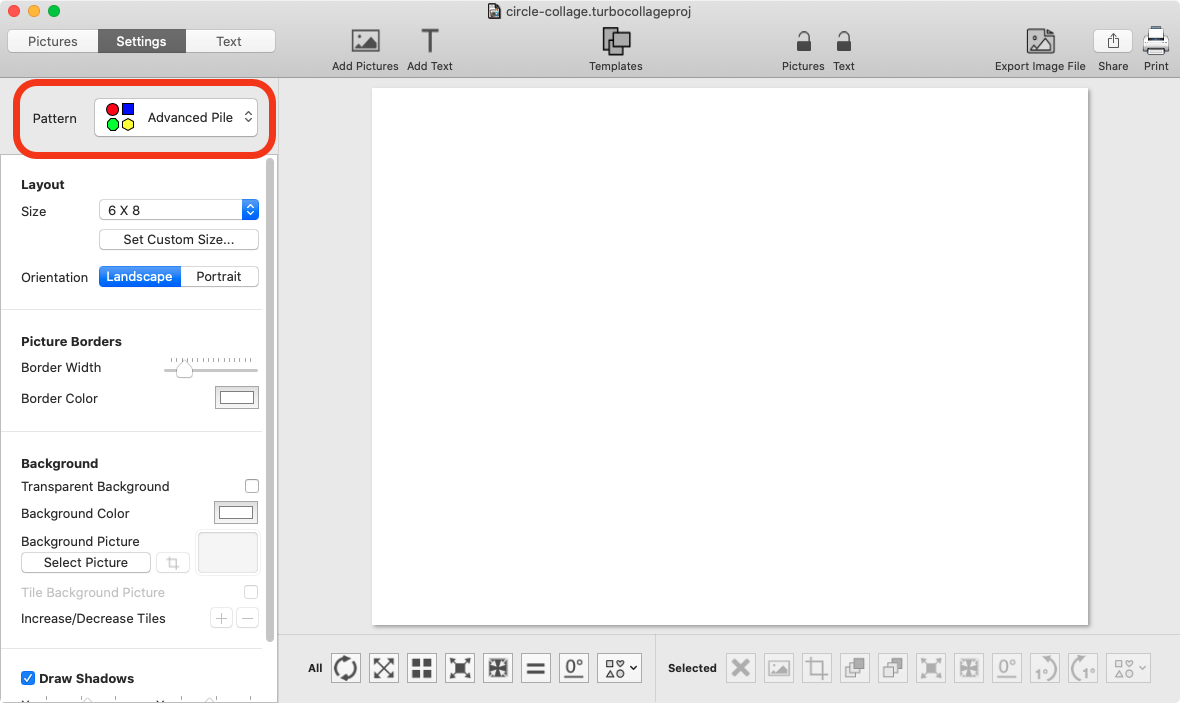
The first thing you need to do is fire up TurboCollage. Next, navigate to the Settings panel and select the Advanced Pile pattern.
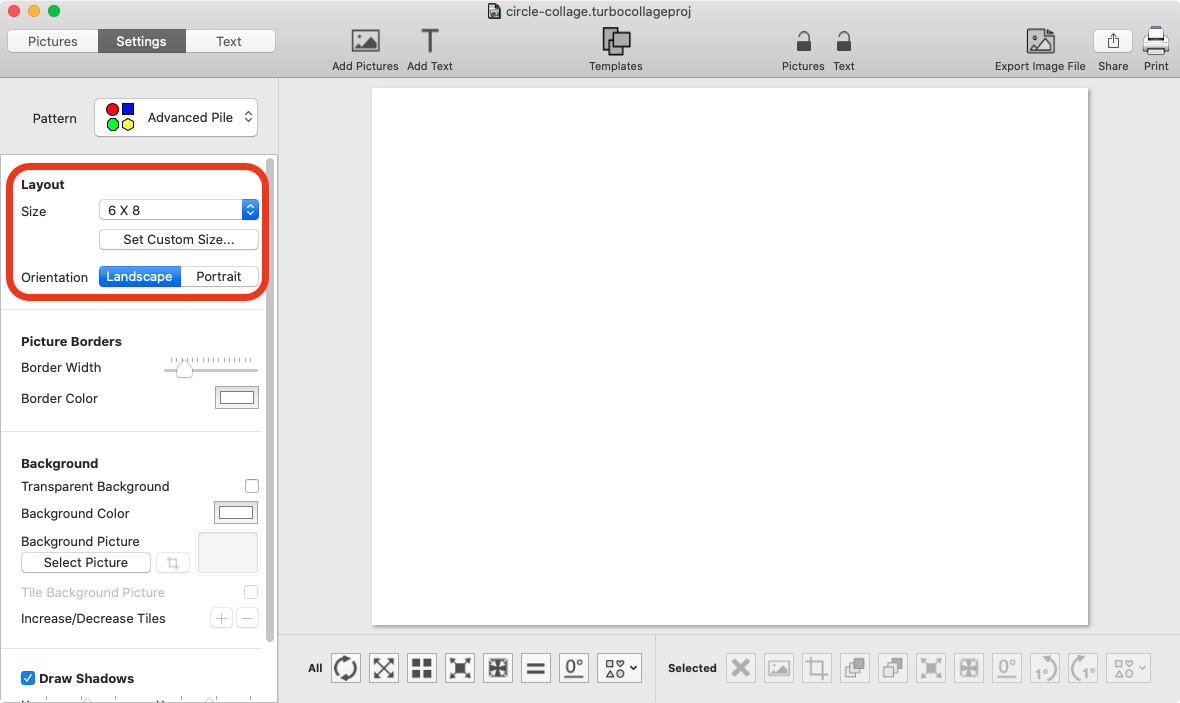
Step 2: Set an Output Size
Set a size for your circle collage from the Layout section in the Settings tab.
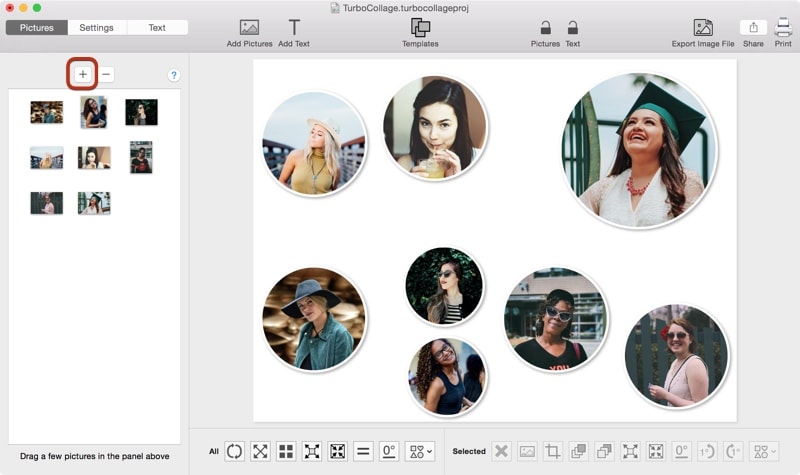
Step 3: Let's bring your collage to life! Add some pictures!
Of course, you can't create a collage without any photos! So, now it's time to add all the pictures you want to feature in your circle collage. To do this, navigate to the Pictures tab and hit the +/Add Pictures button.
Step 4: Reposition and Resize Your Images
You may want some photos larger than others. Additionally, you may want to reposition your photos to draw attention to your favorites. Luckily, making these changes is simple. For example, to change the position of an image, simply drag and drop it:

To resize your image, use this button:

To change the orientation of your image, for example, presenting it at a 45-degree angle, use this button:

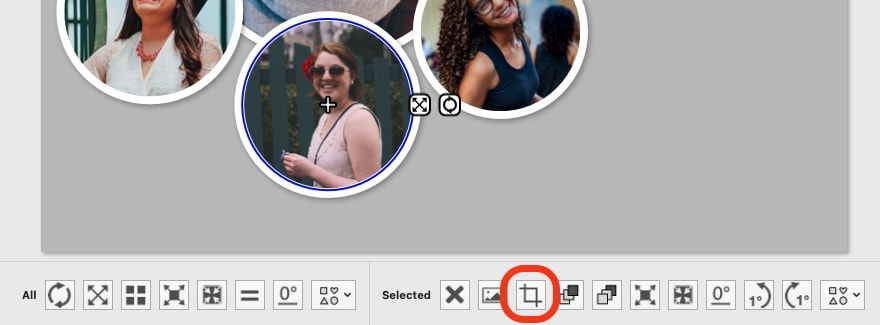
Step 5: Crop Photos
You may find that some photos don't look quite right within the circle and would benefit from some additional cropping. To do this, simply click on the photo to select it, navigate to the bottom panel and select the crop function to open the cropping window. From here, play around with your image until it looks how you want it to within the circle.
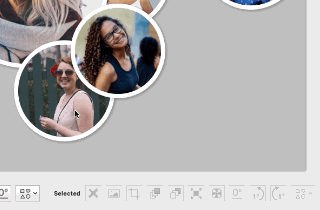
Step 6: Front or Back? You Decide
You can also draw attention to some photos over others by bringing them forward or, alternatively, sending them back. To do this, select your photo and use the "Move selected photo up" or "Move selected photo down" buttons on the bottom panel.
Step 7: More Customizations!
Customizations don't stop at resizing and repositioning your photos. You can also change other design details like Border Width, Border Colour, Background Colour, and more by playing around with the options on the left panel.
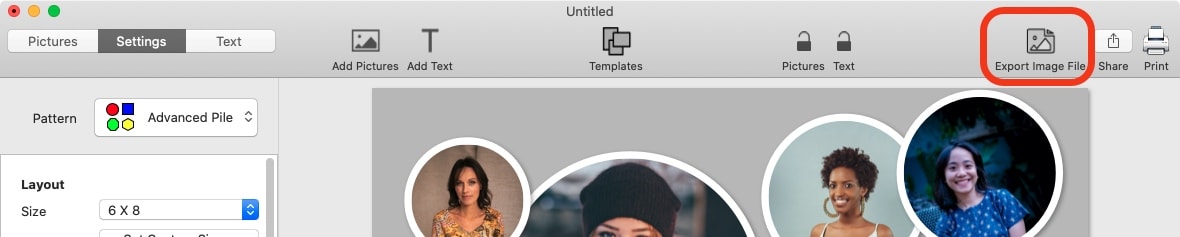
Step 8: Export Your Circle Collage!
Save your masterpiece by exporting your collage as a JPG and bring it to life by printing and framing it with the printing service of your choice. Show it off to the world! To do this, select the Export Image File at the top right of the window.
Here’s a video that demonstrates the creation of a circle collage:
Make a Circle Photo Collage with Equal Photos Arranged in a Regular Pattern

Now let's learn how to create a circular photo collage with evenly placed images in a regular pattern, similar to the one shown above. Please note this method only applies to TurboCollage v7.2.1 and later.
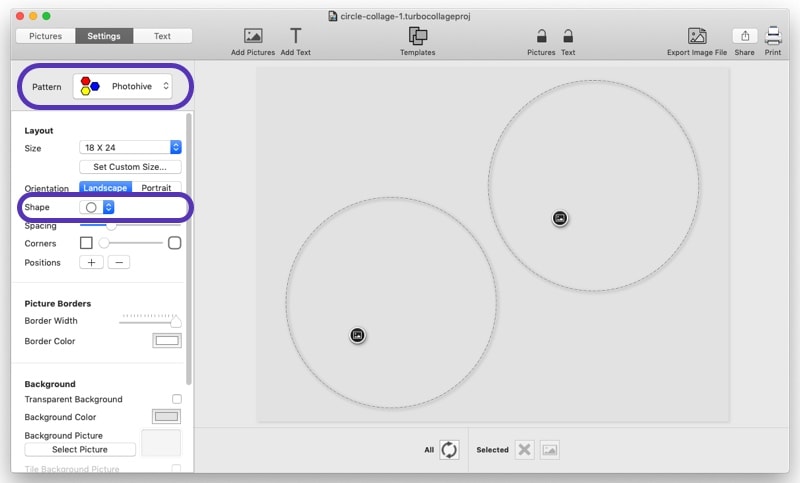
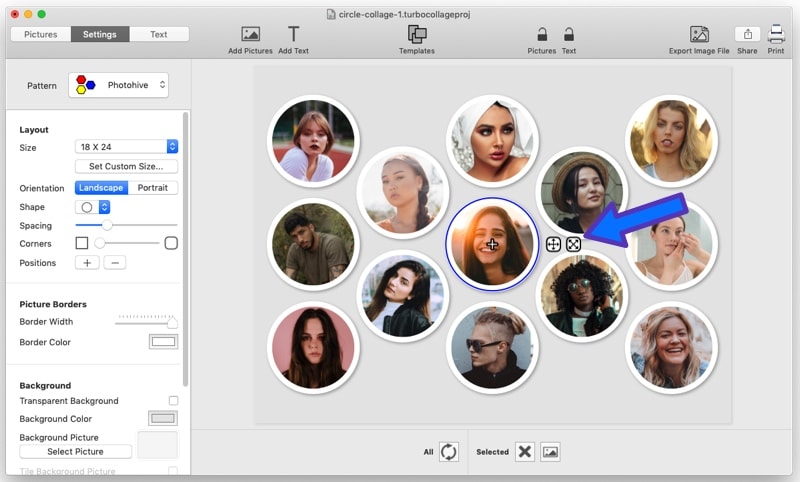
Step 1: Unleash the Photohive
Fire up TurboCollage, and under the Settings tab, select the Photohive pattern and Circle shape.
Step 2: Add Photos!
Click the +/Add Pictures button under the Pictures tab to add your photos.

Step 3: Adjust Your Photos
You can adjust each photo to suit your needs using the Settings tab's controls. For example, you can change the spacing, border color and width, and more.
You can adjust each picture within its frame using the controls shown below:
Step 4: Export Your Circle Collage
Export your circle collage by selecting the Export Image File, located at the top right of the window!
Make a Circle Shape Collage


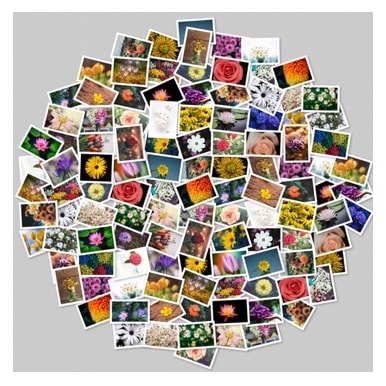

The samples above make a circle shape by arranging many smaller photos in different ways. If you're looking to create this kind of circle collage, you'll need to use our FigrCollage shape collage software.
Wrapping Up
Creating a circle collage is a fun and creative way to showcase your memories and photos. With the step-by-step instructions and tools provided in this guide, you'll be able to make a beautiful circle collage in no time. So grab your photos, get creative, and enjoy the process of bringing your memories to life. The possibilities are endless, so let your imagination run wild and make a round collage that truly represents you. Happy creating!
Tweet This Circle Collage Making Method