How to Make a Side by Side Photo in 60 Seconds

Want to learn the fastest and easiest way to create stunning side-by-side photos?
You're in the right place!
In this article, we will show you how to put 2, 3, or any number of photos side by side! And the good news is that anyone can do it - no design background or expertise is required!
Make a 2 Photo Side By Side Collage

Buckle up! This section is your ultimate guide to crafting a 2 photo side-by-side collage. We'll take you through all the detailed, step-by-step instructions you need.
Step 0: What Do I Need To Create a Side-by-Side Collage?
All you need is a few photos and TurboCollage installed on your Windows or Mac PC.
If you still need to install TurboCollage, you can do so by clicking this link. Don't worry; the full download and installation take less than a minute.
Step 1: Fire Up TurboCollage
Simple enough! You can't create a collage without your collage-maker, so you first need to open the app.
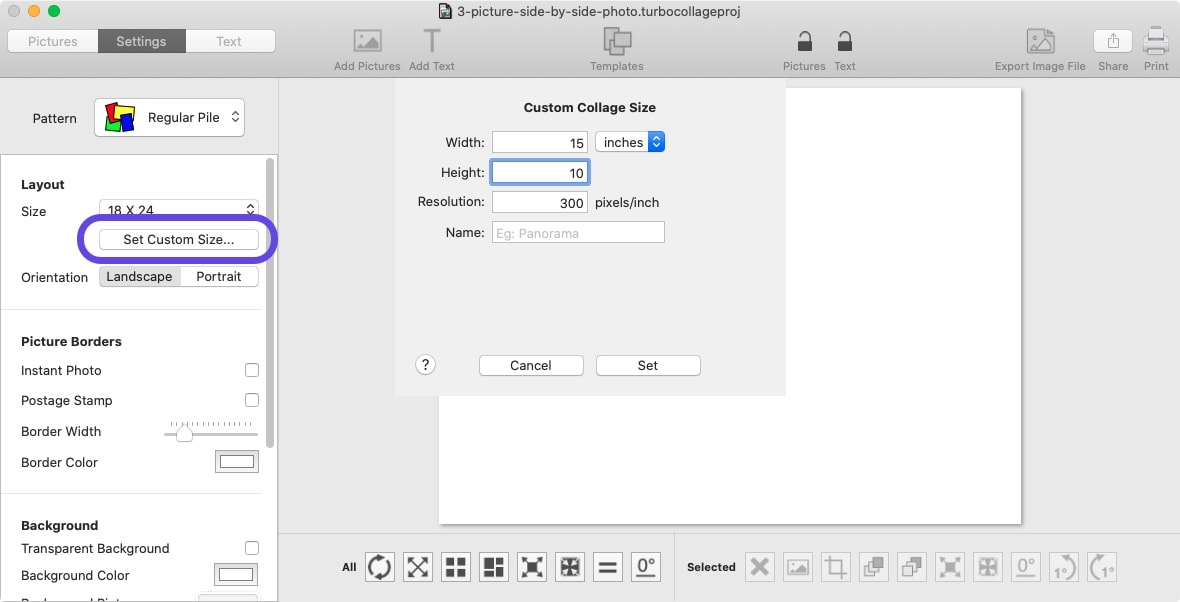
Step 2: Set Your Collage Size
Next, navigate to the settings window and select the output size for your side-by-side picture. For this example, we'll set the width and height to 15 and 10 inches, respectively. Of course, you're not limited to these dimensions – feel free to choose any size that suits your style!
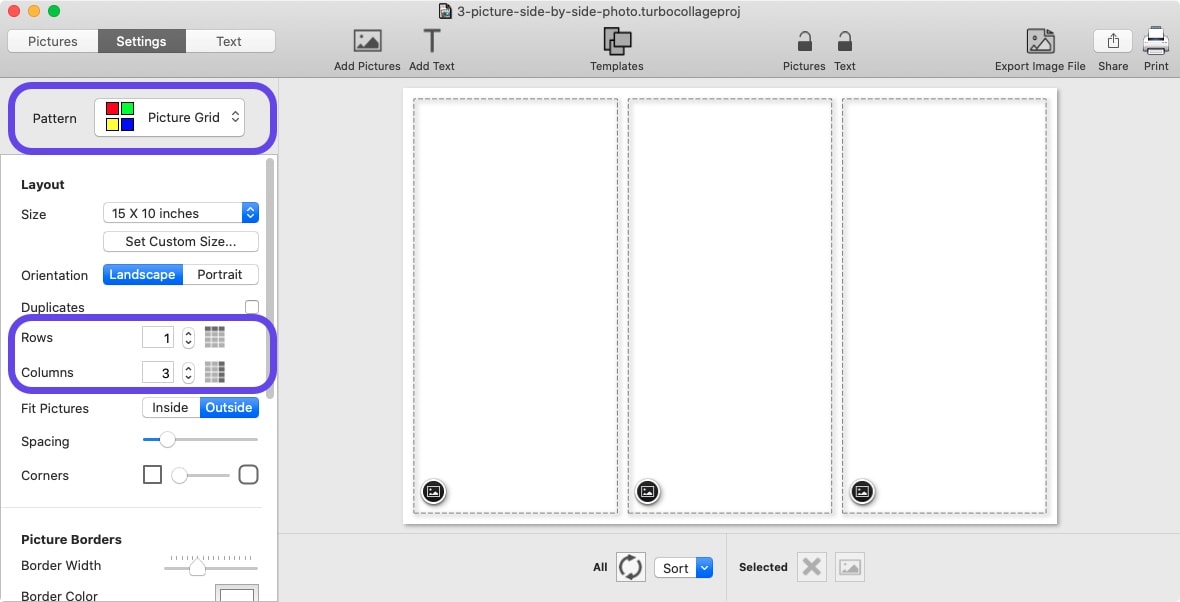
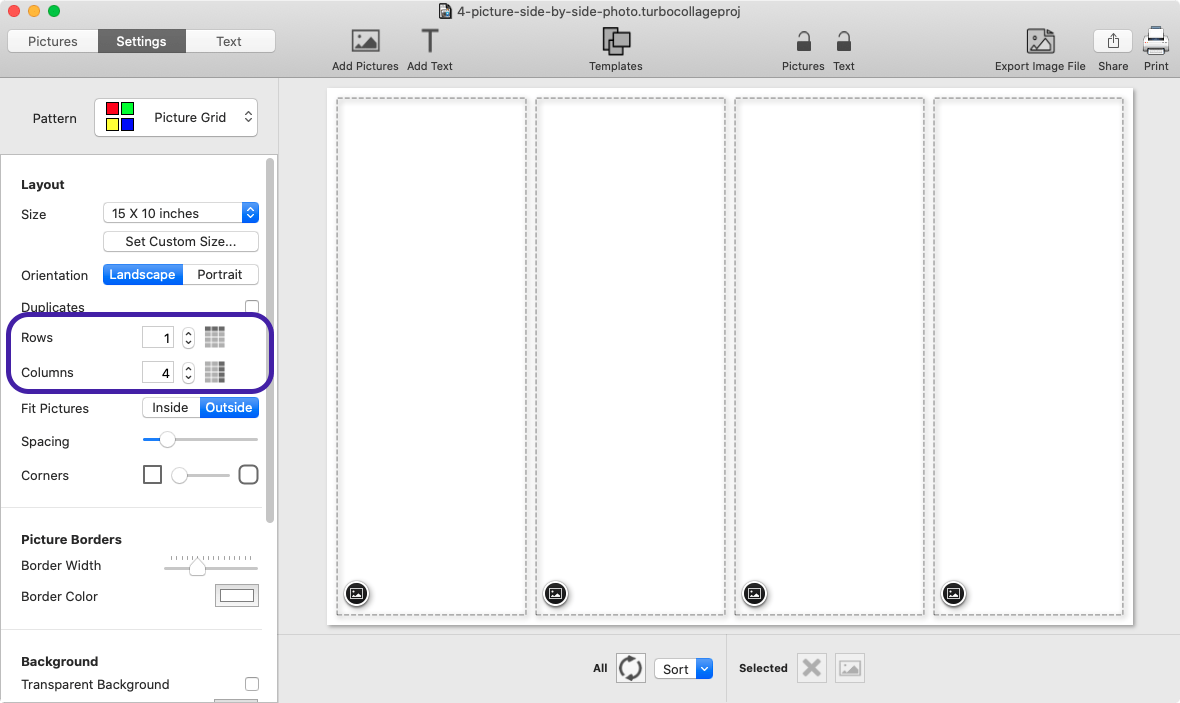
Step 3: Setup Your Collage Layout
Let's begin by selecting the Picture Grid pattern. Since we're creating a 2-photo side-by-side collage, we'll need to set the number of columns to 2 and the number of rows to 1. Easy enough, right?

But what if you want to make a 3 photo side-by-side collage instead? No problem! Set the number of columns to 3, like this:
And if you're feeling adventurous and want to combine even more images side-by-side, all you have to do is set the number of columns to match the number of images. So, let's say you have 4 images. Here you would create 4 columns:
Step 4: Add Your Photos!
You can't have a photo collage without photos, so it's time to add some pictures. To do this, simply navigate to the Pictures tab and hit the +/Add Pictures button.

Step 5: Play Around With Borders
By default, your photos will have a somewhat thicker border, making the images appear further apart. It will also enable a shadow effect on the border to help create definition.
If you want to remove the shadow effect and reduce the border width to zero to give your collage a simpler look, drag the Border Width all the way down and untick Draw Shadows.

Step 6: Change Your Background Color
In our examples, we've used white as the background color. However, you can choose any color you want! Let's try black:

Step 7: Pan and Zoom Your Photos Within the Border
You may want to zoom in on a particular object in one or all of your photos to help it fill the frame. To do this, simply click the image to select it and then use the pan and zoom controls.

You can also pan and zoom photos in the side by side collage using the crop control as shown below:

Step 8: Reorder Your Photos
Would your photos look better or in a different order? No problem - try dragging a picture to a new cell to change its position.

Step 9: Export and Show Off Your Side-by-Side Collage!
Ta-da! Your side-by-side photo masterpiece is complete. Now, it's time to share your creation with the world. Export it as a JPG image; you can print it out, send it via email, or showcase it on your favorite social media platform.

Make a N Photo Side by Side Collage - Combine Any Number of Photos Side by Side
You can follow the same steps you used to make a 2 photo side by side collage to combine two, three, four, or even more images into a photo collage. All you need to do is the increase the number of columns in the step 3.
Let's say you are looking to combine 5 photos side by side, you will set the number of columns to 5 as shown below:

Since you're combining more photos, you should also use a wider size in step 2. I have set the size to 20 inches wide and 5 inches high in the screenshot above.
Video Guide to Make a Side By Side Collage
Our helpful video guide below illustrates the steps to create a side by side photo.
Side by Side Photo Examples
Here's an example of a 2 picture side-by-side photo:

Here's an example of a side-by-side photo collage with 3 pictures:

Here's an example of a 4 picture side-by-side photo:

Take a look at this cheerful example—a collage with 5 pictures lined up side by side!

Remember, you can put any number of photos side by side; here's an example of a side-by-side photo with 10 pictures:

In artists' terminology, a 2 picture side-by-side photo is a diptych, a 3-picture is a triptych, and a 4-picture is a quadriptych. Sometimes such photo arrangements are collectively called polyptychs.
The Case for a Side-by-Side Photo Collage
So, why exactly would you want to create a side-by-side photo collage?
Well, many Instagram (and other social media) trends rely on this format to showcase a quick comparison or to tell a story. Here are some popular use cases for side-by-side photo collages:
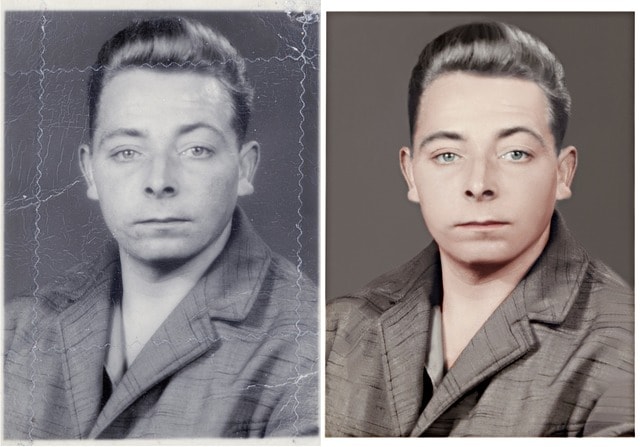
1. Before-and-after photos
Here, the focus is on showcasing a transformation over time. This could include weight loss or muscle gain, home renovation projects, landscaping transformations, or other makeovers. Here's a side-by-side photo demonstrating the result of image restoration:
2. Comparisons
Side-by-side photos are great for comparing two or more similar items, such as different clothing styles, makeup looks, or haircuts. They can also be used to compare the same object or location at different times or in different contexts. The "Who wore it best?" Instagram trend comes to mind here.
3. Tutorials
Side-by-side photos effectively show step-by-step processes like recipes or DIY projects. By showing each step of the process side-by-side, viewers can easily follow along and see how the final product is created.
4. Storytelling
Side-by-side photos can tell a story. This could include historical events, personal milestones, or travel adventures. An Instagram trend that comes to mind here is the "9 months in, 9 months out" pregnancy and baby progression trend.
Wrapping Up
Congratulations, you've made it to the end of our tutorial on creating a side-by-side photo collage! Armed with our step-by-step instructions and tips, you should now be able to create two, three, four, or five plus side-by-side image collages for your latest project.
Tweet This Side by Side Photo Making Method