How to Easily Create an A3 Photo Collage

An A3 collage is an excellent choice for creating compact posters and signage. With dimensions of 297 millimetres by 420 millimetres, this size is perfect for showcasing a variety of images and text in a visually appealing arrangement. This format allows ample space to include detailed designs while maintaining a manageable display size in smaller environments, such as classrooms, cafes, or community bulletin boards.
This post will outline simple steps to create a collage on an A3 sheet. As a demonstration, we will showcase two photo collages. Here's a tutorial for making a collage of any size.
Here's what you'll need to get started:
- A selection of photos saved on your computer, whether you're using a Mac or a Windows PC. These images will be the foundation of your collage.
- TurboCollage software. If you haven't downloaded it yet, don't worry! You can quickly grab it and install it from here.
- An A3 sheet if you intend to print your collage.
- A printer capable of handling A3 size if printing is in your plans.
With these items on hand, you'll be all set to create your collage! Let's go through the steps to create a collage.
Creating an A3 Photo Collage with TurboCollage
With TurboCollage, you can easily design stunning A3 photo collages in various styles. The first step to get started is to set the collage size.
Setting the Collage Size to A3
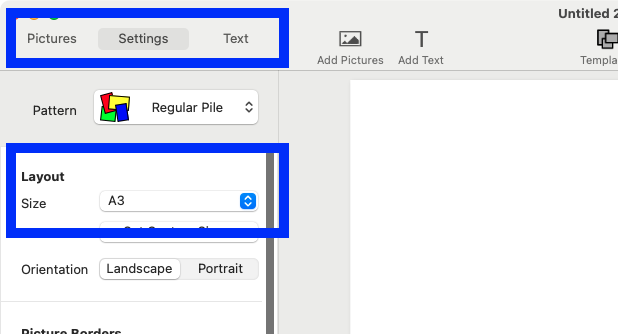
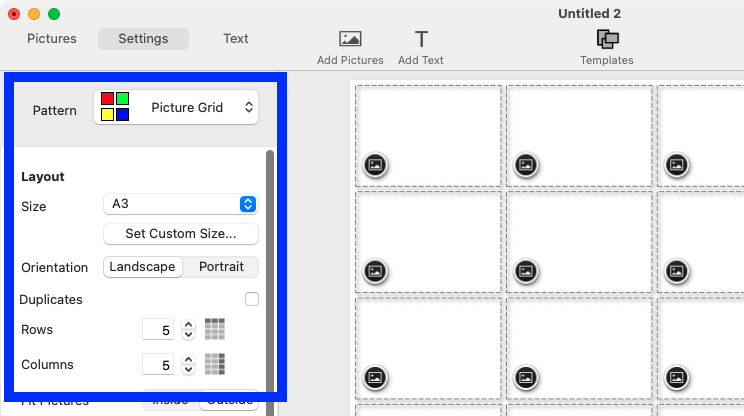
To set the collage size, open TurboCollage and head over to the Layout section found under the Settings tab. From there, simply select A3 from the Size drop-down menu.
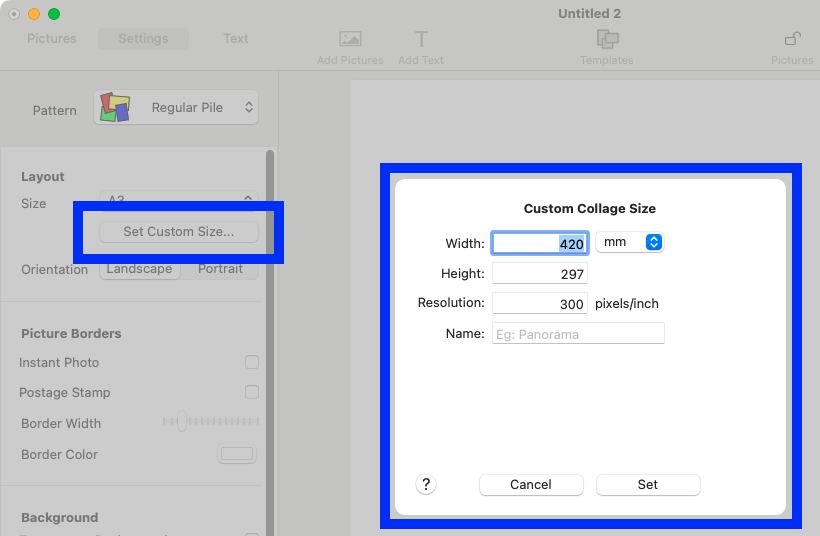
If you prefer, you can also specify the size manually by clicking on the "Set Custom Size..." button in the Layout section.
The A3 dimensions you need are:
- 297 mm x 420 mm
- 29.7 cm x 42 cm
- 11.69 inches x 16.54 inches
When you set the resolution to 300 pixels per inch, the dimensions in pixels will translate to 3508 px x 4962 px. This is calculated by multiplying the dimensions in inches by the resolution (11.69 inches multiplied by 300 for width and 16.54 inches multiplied by 300 for height).
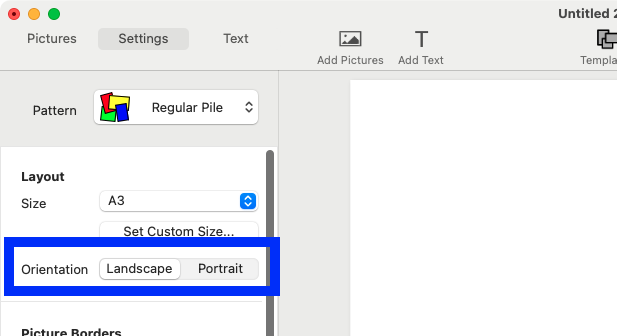
You can create your collage in either Landscape orientation (420 mm wide and 297 mm high) or Portrait orientation (297 mm wide and 420 mm high).
Having established the collage size, let's explore how to create a variety of A3 collages:
Create an A3 Picture Grid
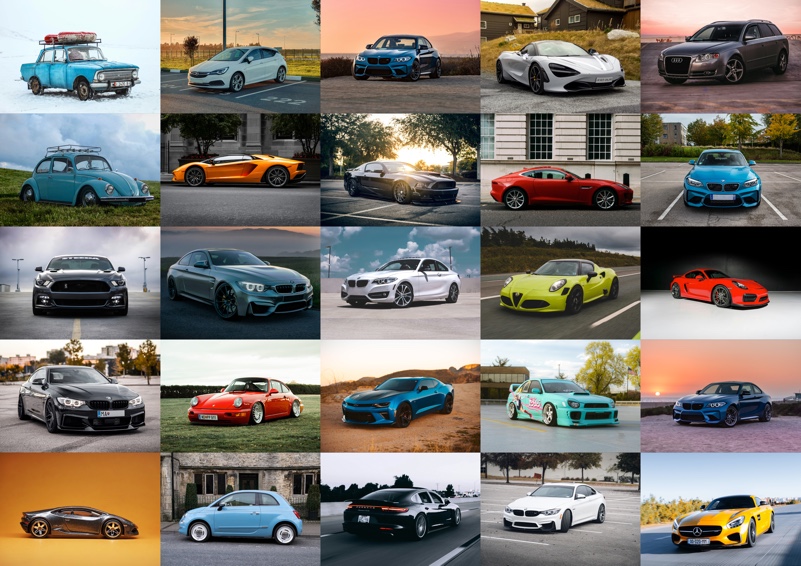
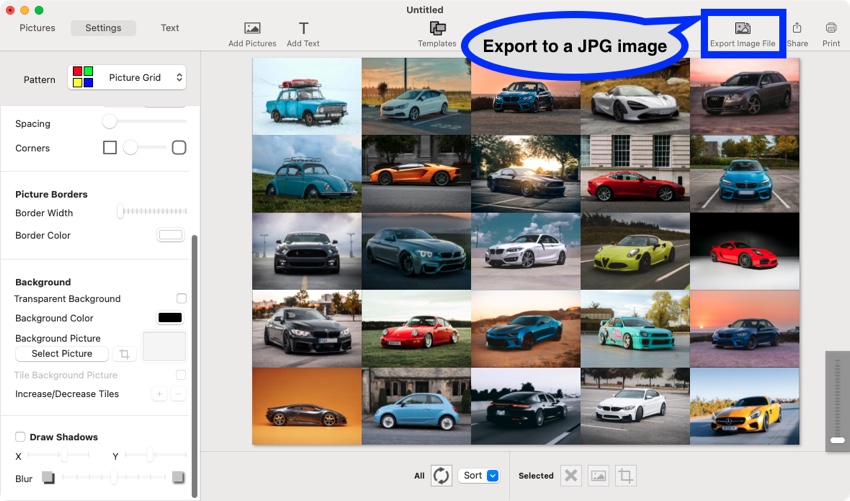
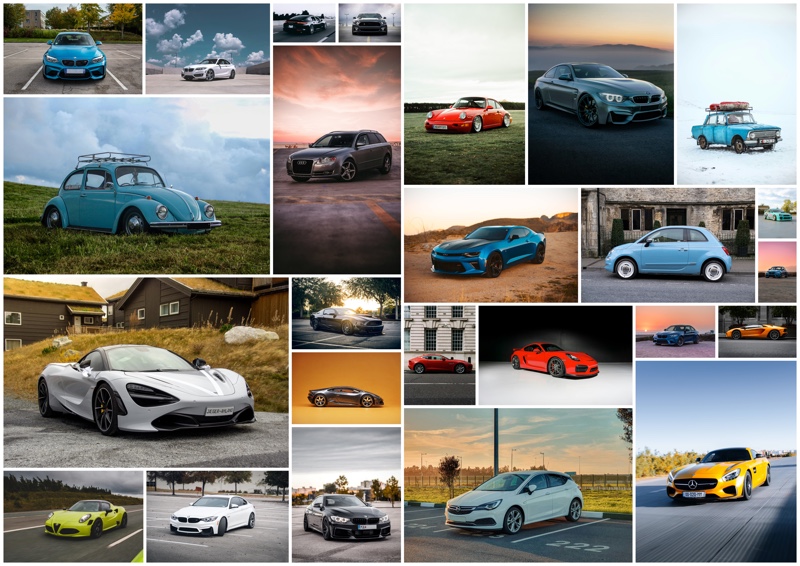
An A3 photo grid. The size of this image has been reduced for fast downloading. Download original.
Follow these steps to make an A3 photo grid:
1. Begin by adjusting the collage size to A3, as previously mentioned.
2. Choose Collage Pattern: Next, select the "Picture Grid" pattern and decide how many rows and columns you want. In this example, we'll create a landscape collage with five rows and five columns, but feel free to mix and match rows and columns to fit your design.
Here's a step-by-step guide on creating a picture grid collage.
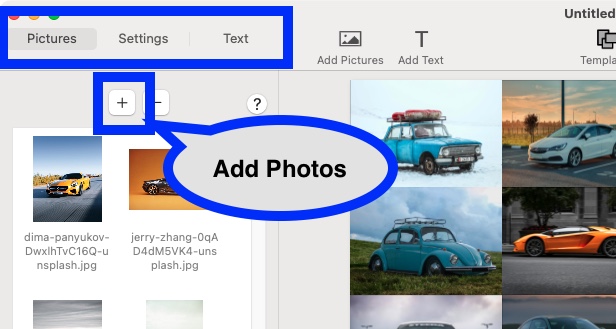
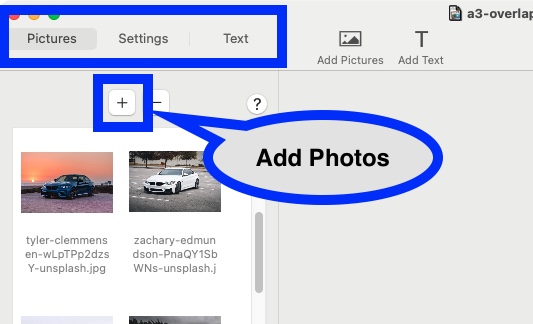
3. Add Your Pictures: Go to the Pictures tab and click the "Add Pictures" button to include images in your collage. TurboCollage will automatically fill up the grid with your chosen photos.
4. Personalize Your Layout: Customize your collage to make it unique. You can rearrange photos in different cells, crop images within their individual spaces, add shadows, and select a background colour. You can even include a text message in your collage for a personal touch.
5. Export Your Collage to JPG: Once you're happy with your collage, export it as a JPG, PNG, or TIFF image. This way, you can easily share it with friends or print it on an A3 sheet.
Craft an Overlapping Collage on A3 Paper

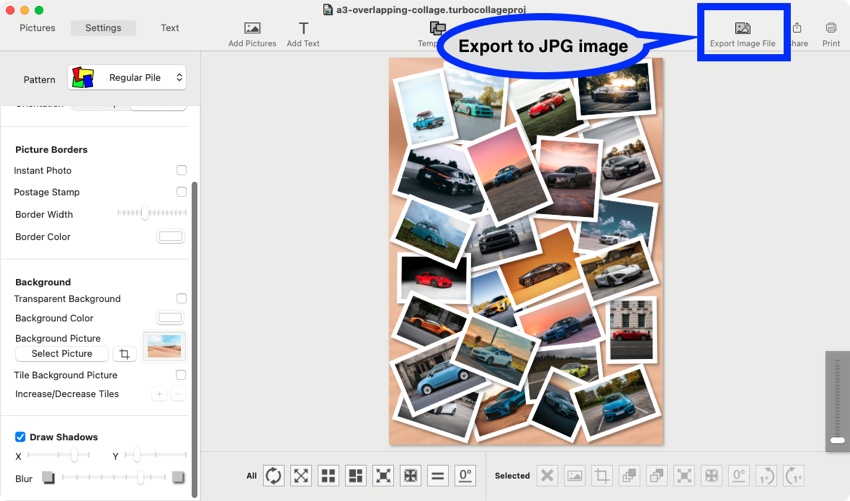
An A3 paper-size overlapping collage in portrait orientation. The size of this image has been reduced for fast downloading. Download original.
1. Set Up Your Collage Size: Begin by configuring your collage to A3 dimensions, as shown in the detailed instructions above.
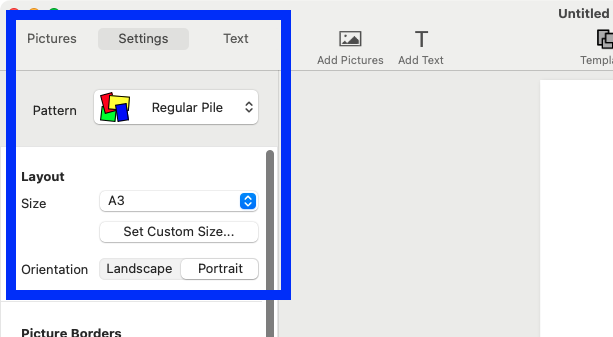
2. Choose a Collage Pattern: Select the "Regular Pile" option for your collage layout.
3. Add Your Photos: Import your selected photos into the collage. Using TurboCollage, the program will automatically arrange the images to overlap, giving your collage a vibrant, randomly placed look reminiscent of printed photos.
4. Personalize Your Layout: Feel free to tweak your collage by moving photos around, resizing them to your liking, or rotating them for added flair. You can also adjust the layering of images, bringing some to the forefront while sending others to the back for a more dynamic effect. Check out the detailed tutorial for a comprehensive guide on crafting overlapping photo collages.
5. Export Your Collage: When you are satisfied with your design, export the finished product as a JPG file. This format is perfect for printing and sharing with friends and family.
Additional Ideas for Crafting Collages on an A3 Sheet
There are plenty of creative ways to design an A3 collage beyond just overlapping images or simple photo grids. Here’s another example of how you can transform your collage into something truly unique:
An A3 paper-size photo collage. The size of this image has been reduced for fast downloading. Download original.