Create an Amazing 20-Photo Collage in Five Unique Styles!

Are you looking to create a collage using 20 of your best photos but struggling to find a quick and easy method?
This post will guide you through five simple ways to make a 20-photo collage.
- Make a 20-Photo Overlapping Collage
- Make a 20-Photo Grid Collage
- Automatically Generate a Random Collage Consisting of 20 Pictures
- Create a Collage of 20 Pictures Featuring a Central Image
- Make a Number 20 Shape Collage
Let's get started on creating your perfect photo collage!
What you'll need:
1. 20 photos saved on your computer (this can be a Mac or a Windows PC).
2. TurboCollage software. If you don't have it already, please download and install it here.
Make a 20-Photo Overlapping Collage

Follow these steps to create your first collage:
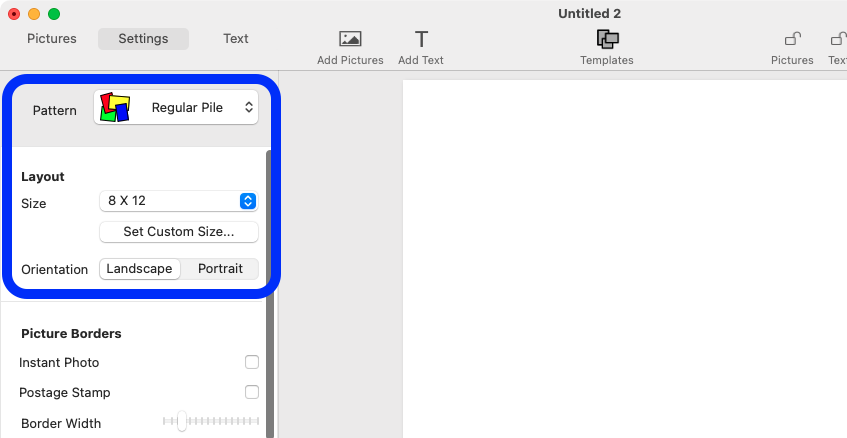
1. Open TurboCollage and select the Regular Pile collage pattern. Then, set the desired size for your collage. For this example, we will use a 12 inches by 8 inches landscape size.
2. Add 20 photos to your collage. TurboCollage will automatically arrange the images so they overlap, giving the effect of randomly placed printed photos.
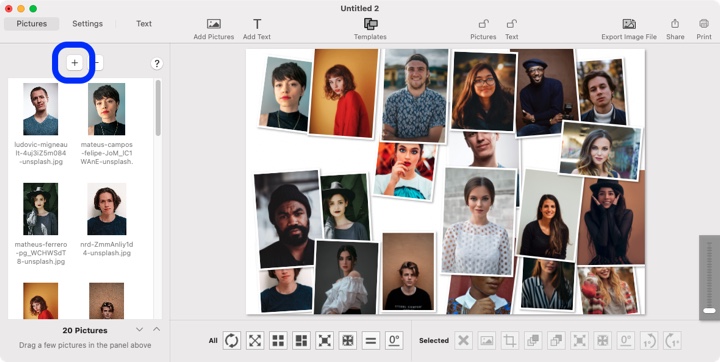
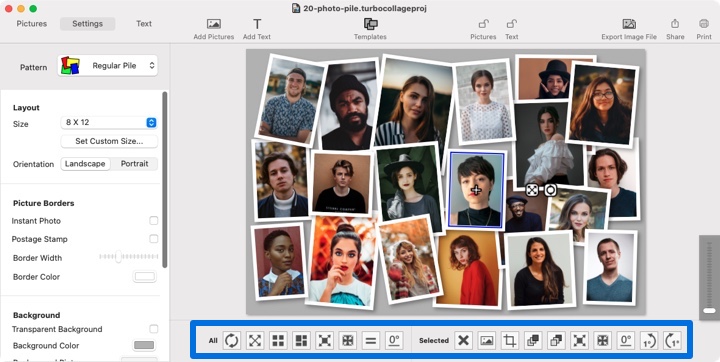
3. Customize the layout by moving the photos around, resizing them (making them smaller or larger), or rotating them as needed. You can also adjust the layering by bringing pictures to the front or sending them behind other images.
For more details, you can explore how to create overlapping photo collages.
4. Once you are happy with the final look of your collage, export it as a JPG file for printing or sharing.

Are you ready to witness this in action? Check out this short video that showcases it perfectly:
Tweet This 20-Picture Overlapping Collage Making MethodMake a 20-Photo Grid Collage
You can create a grid collage if you prefer a more organized layout and want to avoid overlapping images. This example demonstrates how to make a grid with four rows and five columns.

1. Open TurboCollage and select the Picture Grid collage pattern.
2. Set the desired size for your collage, then specify the number of rows (four) and columns (five).
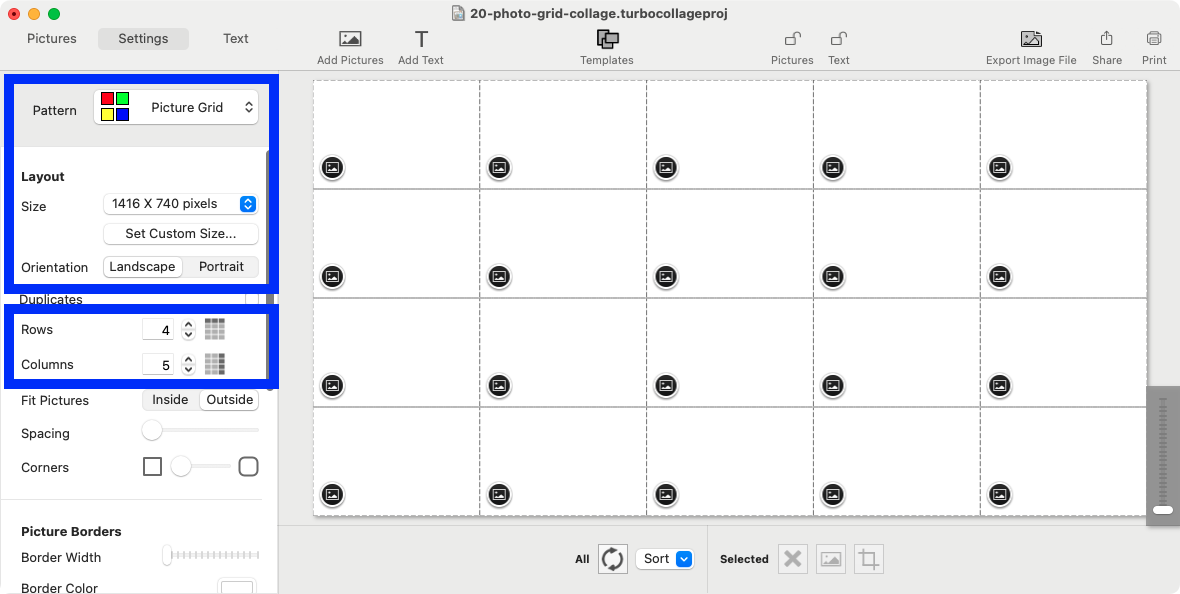
3. Add 20 photos to your collage, and TurboCollage will neatly arrange the images into the grid.
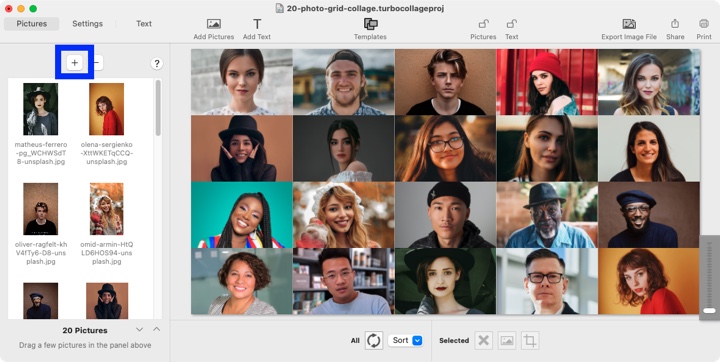
4. You can customize your grid by moving photos to different cells or cropping any picture within its cell. Learn more about making photo grids.
5. Once you are satisfied with the collage, export it as a JPG file for printing or sharing.
Would you like to see the demonstration in action? Here’s a short video for you:
Tweet This 20-Photo Grid Collage Making MethodAutomatically Generate a Random Collage Consisting of 20 Pictures
Let's create our third unique collage like the one shown below.

1. Open TurboCollage and select the Picture Grid (Unequal) collage pattern.
2. Set the collage size to 6 inches wide by 3 inches high. You can use any other size you want.
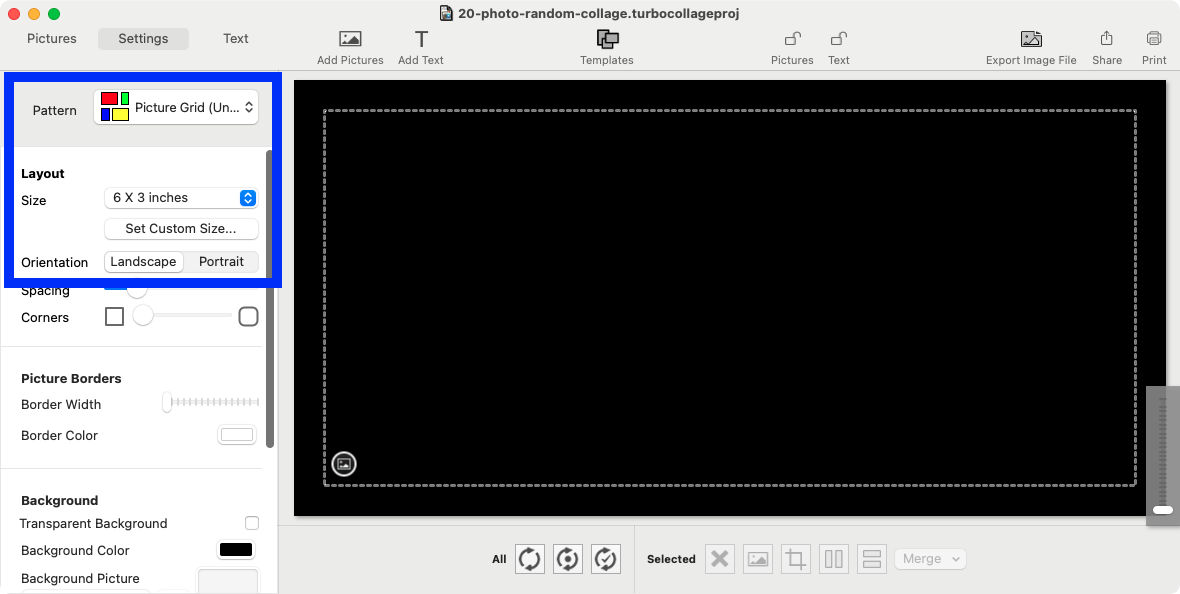
3. Add 20 photos to your collage. TurboCollage will automatically generate a random photo grid using the photos you've added.
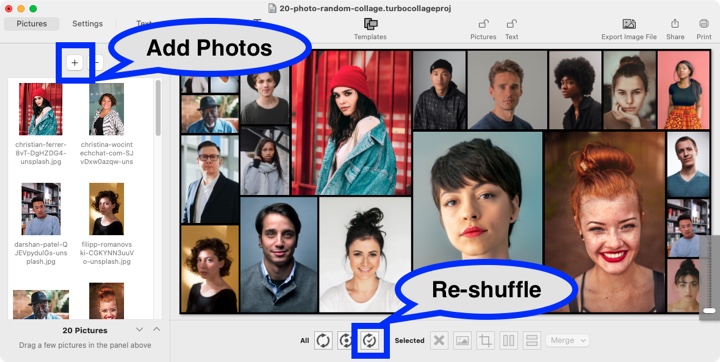
4. You can shuffle the layout multiple times to achieve a unique arrangement that you like.
5. Once you are happy with the collage, export it as a JPG file for printing or sharing.
Would you like to see this in action? Here is a short video:
Tweet This 20-Photo Collage Making MethodCreate a Collage of 20 Pictures Featuring a Central Image
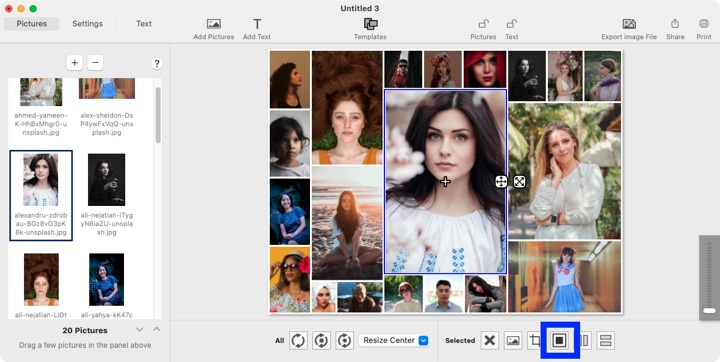
Are you looking to create a collage featuring 20 pictures, with one image highlighted as the primary focus? Follow these steps to design a collage with a central image.

1. Open TurboCollage and select the Center Frame collage pattern. Set the collage size to 8 inches wide by 6 inches high.
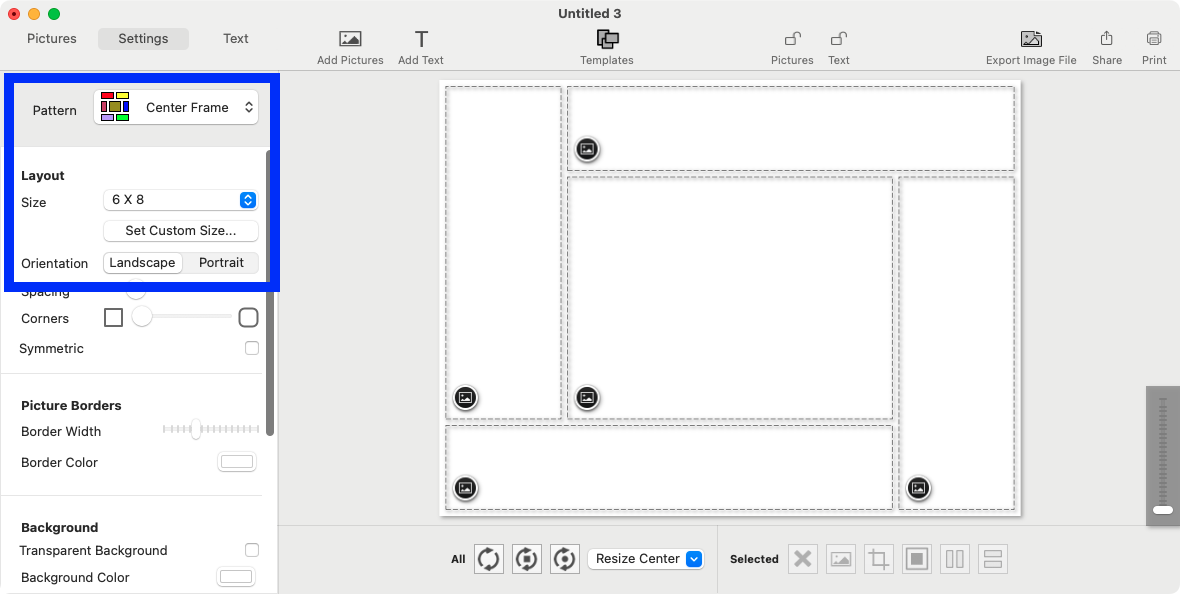
2. Add 20 pictures. TurboCollage will automatically choose one photo as the central image and arrange the rest around it.

3. To designate your chosen picture as the central image, click on it and press the appropriate button, as shown in the screenshot. You can adjust the size of the central picture or shuffle pictures around it. Learn to make a collage with a central picture.
4. Once you have completed your collage, export it in JPG format for easy printing or sharing.
Would you like to see this in action? Here is a short video demonstrating it:
Tweet This 20-Photo Collage Making MethodMake a Number 20 Photo Collage
Let us now make a different type of collage — combining many pictures to form the number 20.
You can easily use our FigrCollage software to make number photo collages like the one shown below.

A number 20-photo collage. The size of this image has been reduced for fast downloading. Download original.