Quickly and Easily Make a 5-Photo Collage

Get ready to up your photo game with our quick and easy guide to creating unique 5-photo collages!
Our step-by-step instructions in this article will guide you through creating twelve collages of 5 photos.
Looking to make a number 5 photo collage?
If you want to make a number 5 from your photos, you can make a number collage using our FigrCollage software.

Table of Contents: 5-Photo Collage Options
- 1-4) Make Any 5-Picture Grid Layout!
- 5-8) Make a 5-Picture Grid of Rows and Columns
- 9-11) Design a 5-Picture Pile Collage
- 12) Make a 5 Picture Zig-Zag Collage
But before you dive in, make sure you have TurboCollage on your device - It takes less than a minute to download and install!
Options 1-4. Make Any 5-Picture Grid Layout!
<<Index
This tutorial will provide comprehensive steps to create collages similar to the 5 photo collages displayed below:


Let's go through the steps to make one of the above collages. Follow similar steps to create other collages.
Step 1: Start Our 5 Photo Collage Maker
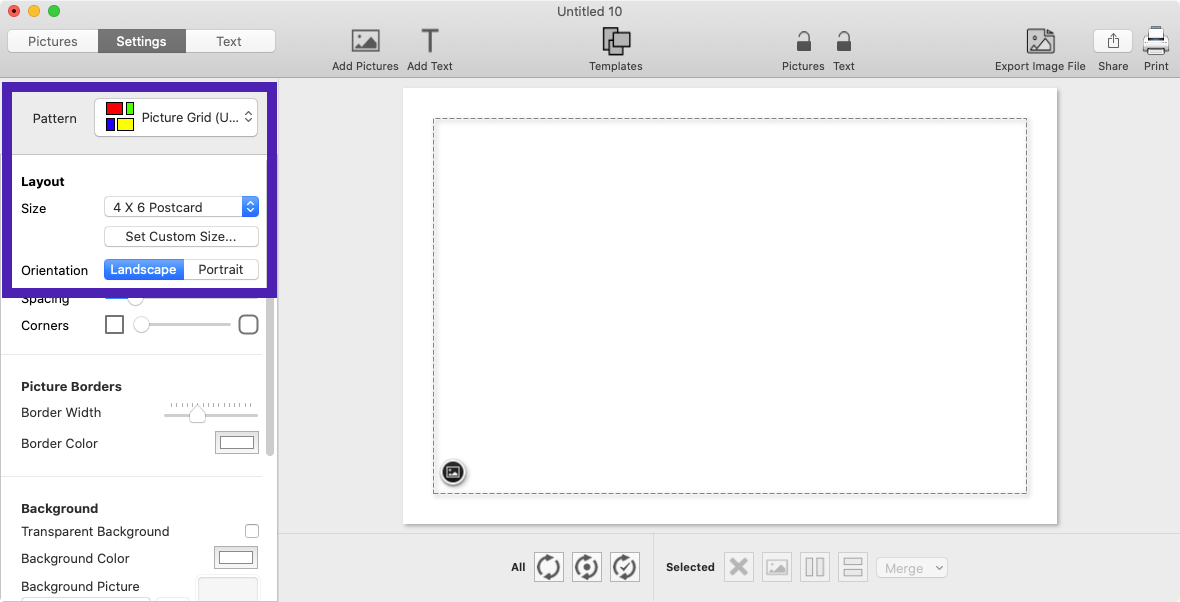
To get started, launch TurboCollage and choose the Picture Grid (Unequal) pattern under the Settings tab.
In this demo, we will use a 4 X 6 Landscape output size for our collage; you can set any size you want.
Step 2: Build the 5-Photo Grid Layout
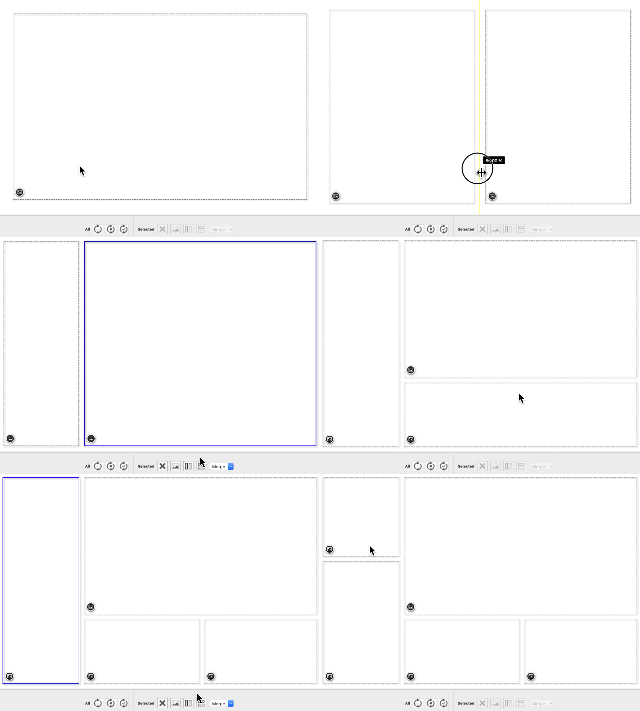
Let us build the layout corresponding to the following 5 photo grid collage. You can use the steps in this section to make a range of 5-picture designs, so experiment and see what works for you.

The splitting tools located at the bottom of the TurboCollage window will help us build the layout quickly and easily.

Use the splitting tools to build the 5 picture grid layout like shown in the screen recording below:
Step 3: Add Photos to Your Collage!
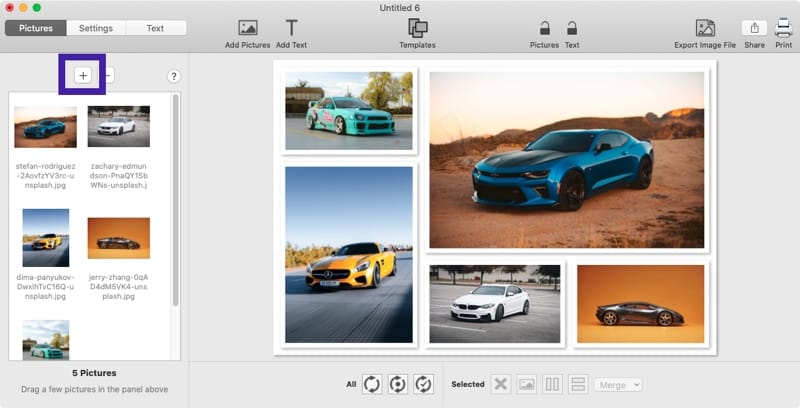
Let's bring your grid to life by adding five eye-catching photos to the layout we crafted in the previous step. Use the +/Add Pictures button to import pictures.
TurboCollage places your images into the grid without any fuss.
Step 4: Customize Picture Placement For a More Striking Look
Fine-tune your grid! Swap and switch photos effortlessly by dragging and dropping them between the cells.
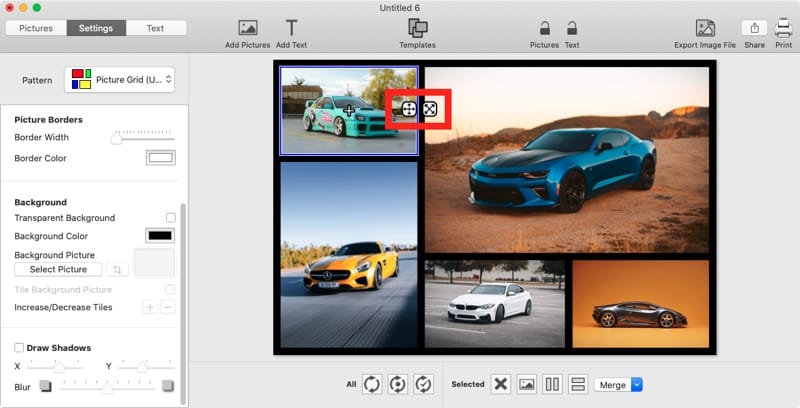
Customize the background color, picture borders and shadows.
With TurboCollage's intuitive pan and zoom feature, you can ensure every picture fits perfectly within its designated cell. To pan or zoom an image, click to select it and then use the controls shown below:
Here's a detailed tutorial on building photo grids like those shown above.
Step 5: Export to JPG And Share With the World!
Once you're happy with your 5-photo collage, click the Export Image File button at the top right of the window. From here, you can share your five-photo grid via email, on social media, or anywhere else you like!

The following 1-minute video illustrates the steps above:
Options 5-8. Make a 5-Picture Grid of Rows and Columns
<<Index
In this section, we will show you how to create the photo grids displayed below. These grids arrange pictures in a fixed pattern of rows and columns.

Columns=5, Rows=1

Columns=1, Rows=5

Set Columns=3, Rows=2, and keep one cell empty.

Set Columns=2, Rows=5, and keep 5 cells empty.
Step 1: Start Our 5 Photo Collage Maker
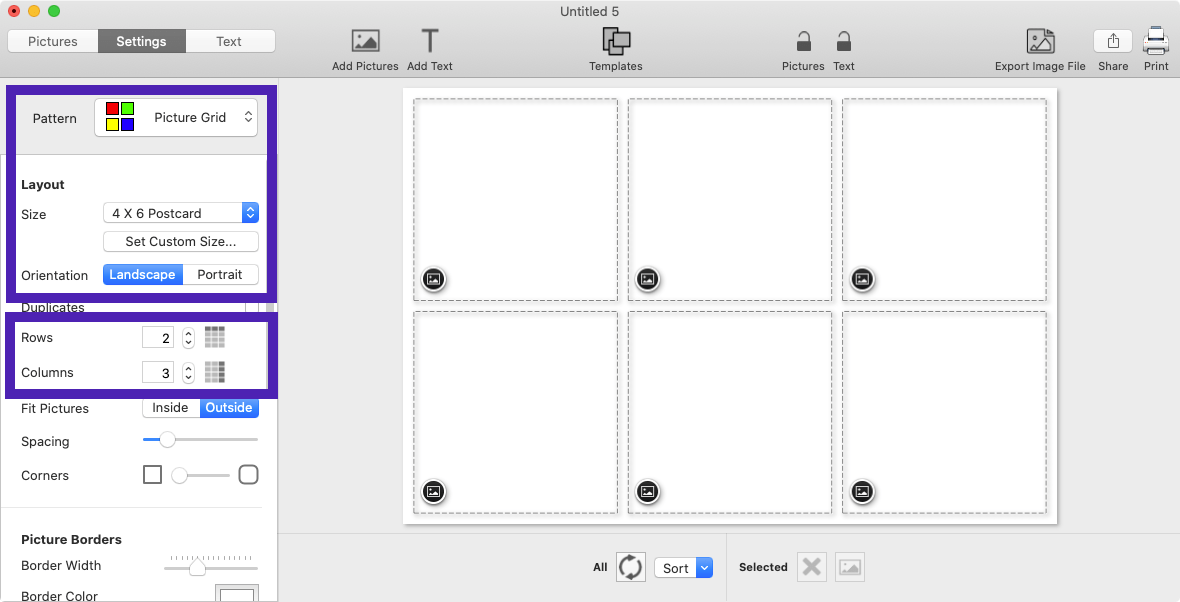
To begin, launch TurboCollage and then choose the Picture Grid pattern under the Settings tab.
Select a collage size from the Size drop-down or use the Set Custom Size button to specify collage dimensions. Set collage orientation to Landscape or Portrait.
Set the number of Rows and Columns in your grid.
Step 2: Add 5 Photos
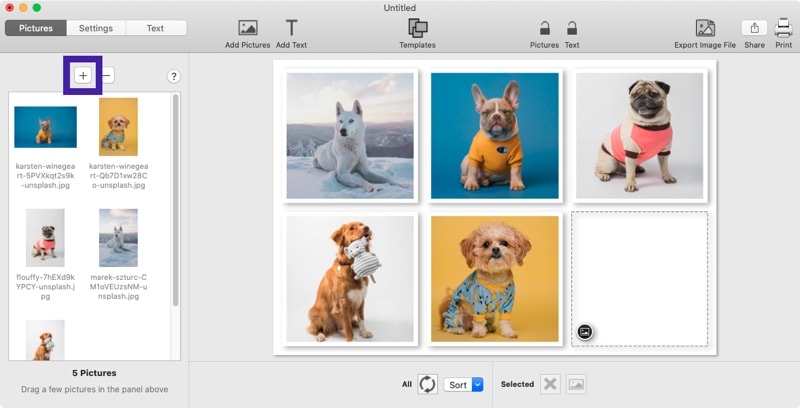
Next, visit the Pictures tab and click the +/Add Pictures button. Pick five photos you want to include, and TurboCollage will place them into the vacant cells in the grid.
The grid can have any number of rows and columns. We will add five photos only and keep rest of the cells empty. In the sample below, we've used 2 rows and 3 columns with an empty cell.
Step 3: Personalize Your Grid
Once you've added the photos, you can drag pictures from one cell to another in the grid. If you'd like to modify the appearance of your 5-photo grid further, you can adjust the background, picture borders, and other settings.
Check out this detailed tutorial to guide you through creating a customized photo grid.
Step 4: Export the 5 Photo Grid to JPG
Once your collage is complete, you can export it as a high-quality JPG, PNG, or TIFF image. From there, the choice is yours - you can easily email, print, or share the exported image on social media to showcase your artistic skills to the world.

Options 9-11. Design a 5-Picture Pile Collage
<<Index
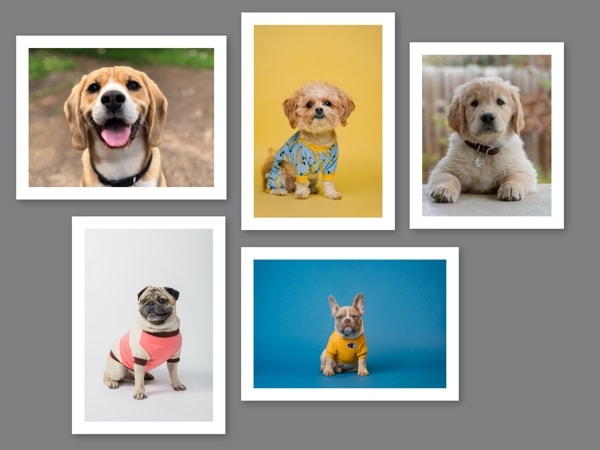
Let's learn to make the 5-photo collages shown below:


Step 1: Start TurboCollage
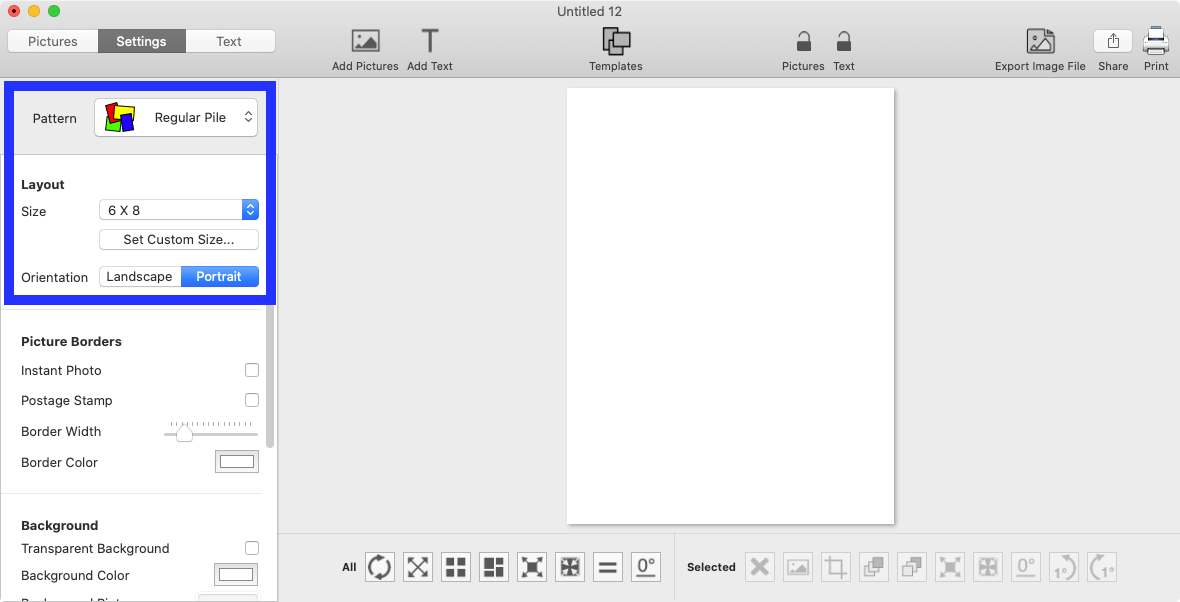
To begin, launch TurboCollage and then choose the Regular Pile pattern under the Settings tab.
Select a collage size from the Size drop-down or use the Set Custom Size button to specify collage dimensions. Set collage orientation to Landscape or Portrait.
Step 2: Add Photos
Next, visit the Pictures tab and click the +/Add Pictures button. Pick five photos you want to include, and TurboCollage will automatically arrange them into a picture pile.
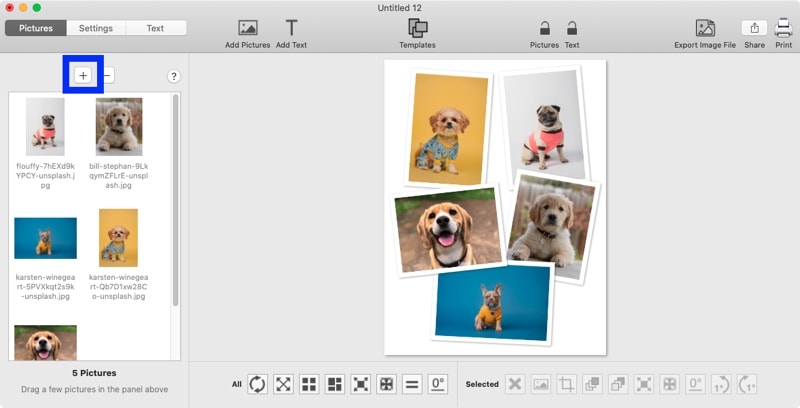
Step 3: Personalize Your Collage Design
Move, rotate, resize, and change the stacking order of photos to get the collage design that you want. In this example, we've also changed the background color to brown.
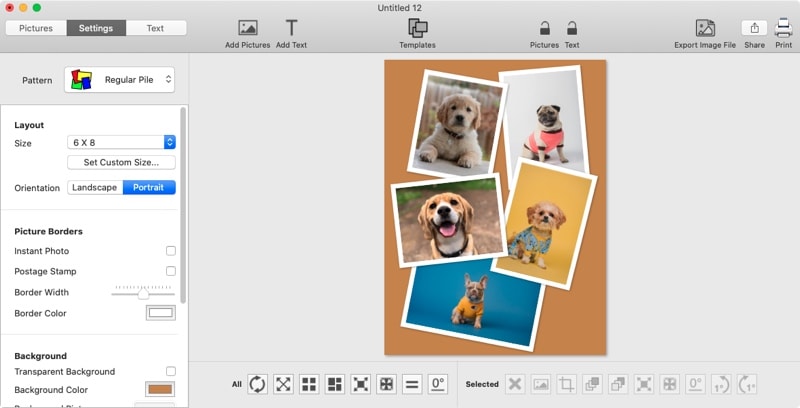
If you want, you can make the photos perfectly horizontal or give them a polaroid look. Here's a detailed tutorial on making overlapping photo collages.
Option 12. Make a 5 Picture Zig-Zag Collage
<<Index

Making a 5-photo Zig-Zag collage works much the same way as the other examples on this list. You launch TurboCollage, add your photos, navigate to the Settings tab, and select the Zig-Zag pattern.
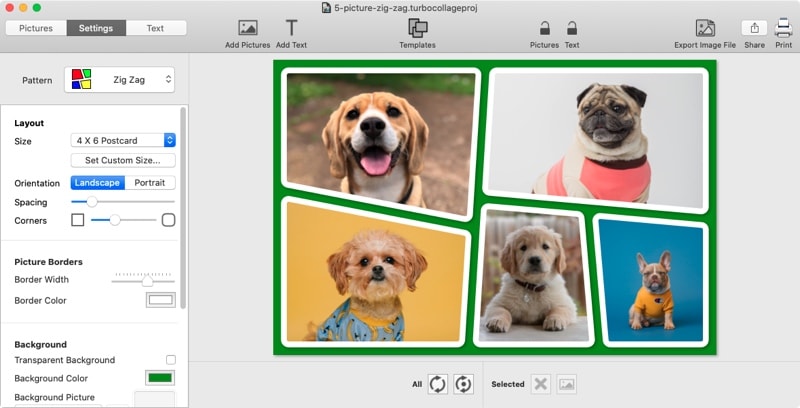
Learn to make a zig-zag photo collage in more detail.