How to Create a Stunning 7-Photo Collage
Polish your collaging game with our quick and easy guide to designing 7-photo collages!
Our step-by-step instructions in this article will guide you through creating nine collages of 7 photos.
Are you looking to make a number 7 collage?
If you want to make number 7 from your photos, you can make a number collage using our FigrCollage software.

Table of Contents: 7 Photo Collage Options
- 1-3) Build Any 7-Picture Grid
- 4-5) Make a 7-Picture Grid of Rows and Columns
- 6-7) Design a 7-Picture Overlapping Collage
- 8-9) Make a 7-Picture Hexagon Collage
But before you dive in, make sure you have TurboCollage on your device - It takes less than a minute to download and install!
Options 1-3. Build Any 7-Picture Grid
<<Index
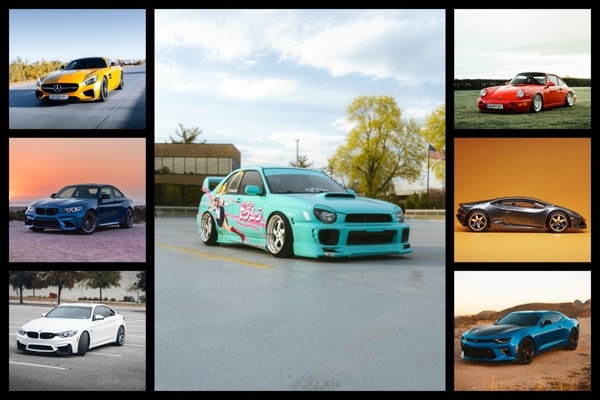
This section will provide detailed steps to create collages similar to the 7 photo collages displayed below:


Step 1: Start Our 7 Photo Collage Maker
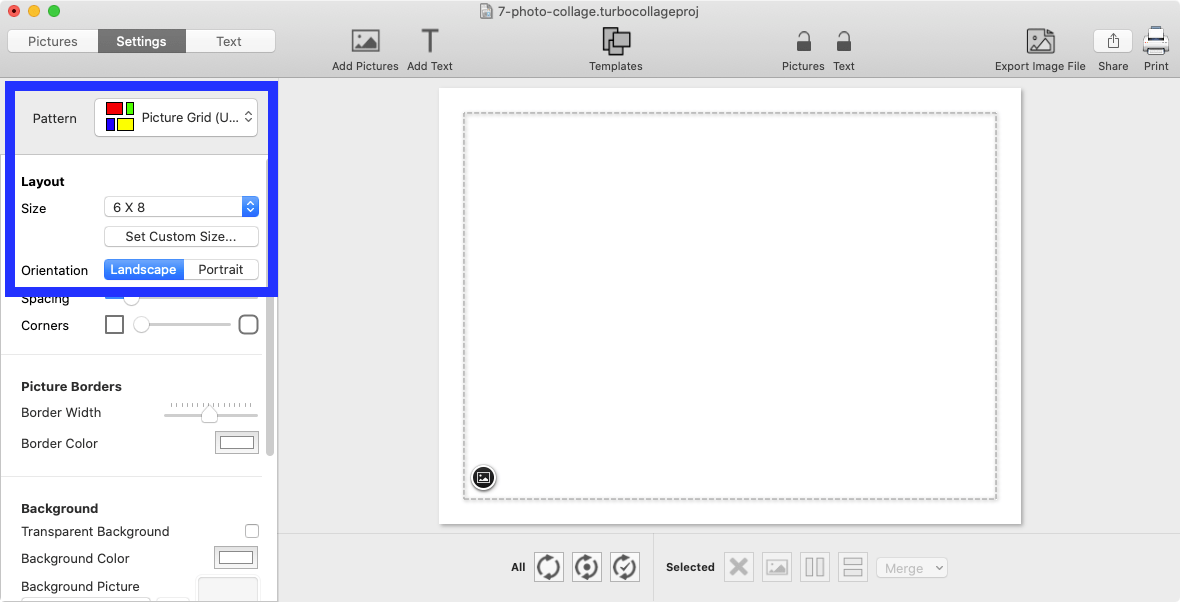
Launch TurboCollage and choose the Picture Grid (Unequal) pattern under the Settings tab.
In this example, we will use a 6 X 8 Landscape size for our 7-photo collage. Feel free to use any size you wish.
Step 2: Form the 7-Photo Grid Setup
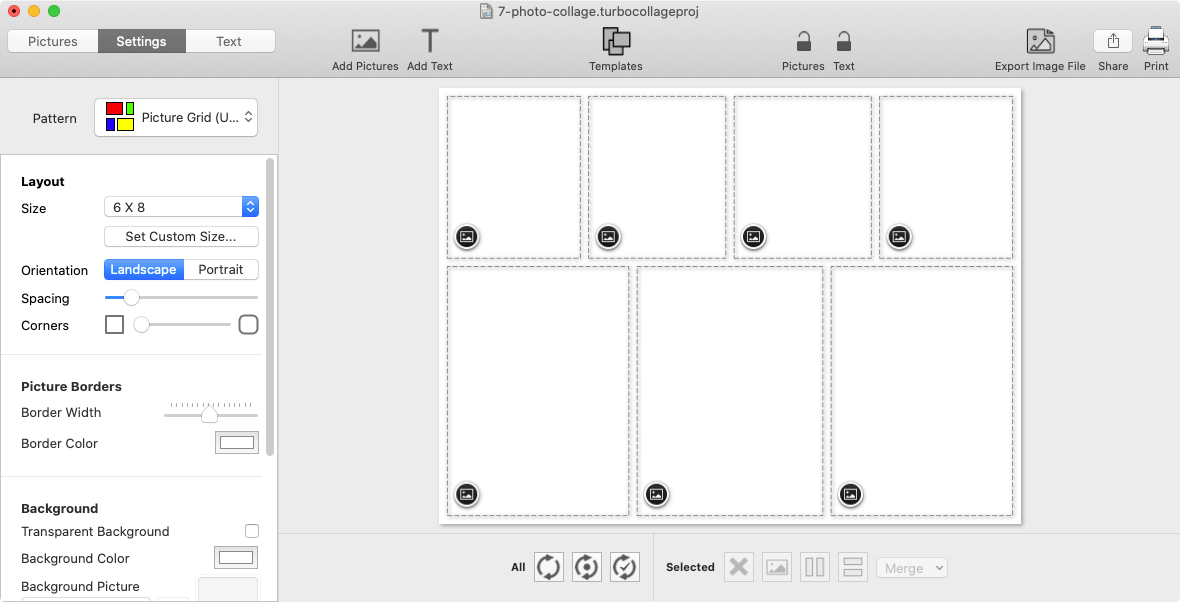
Let us build the layout corresponding to the following 7 photo grid collage.
With TurboCollage, you're not limited to the three example collages above. You can use the steps in this section to make any 7-picture grid layout.

We will use the splitting tools at the bottom of the TurboCollage window to build the layout.

Follow the screen recording below to understand the quick and easy process of creating a grid layout in TurboCollage.
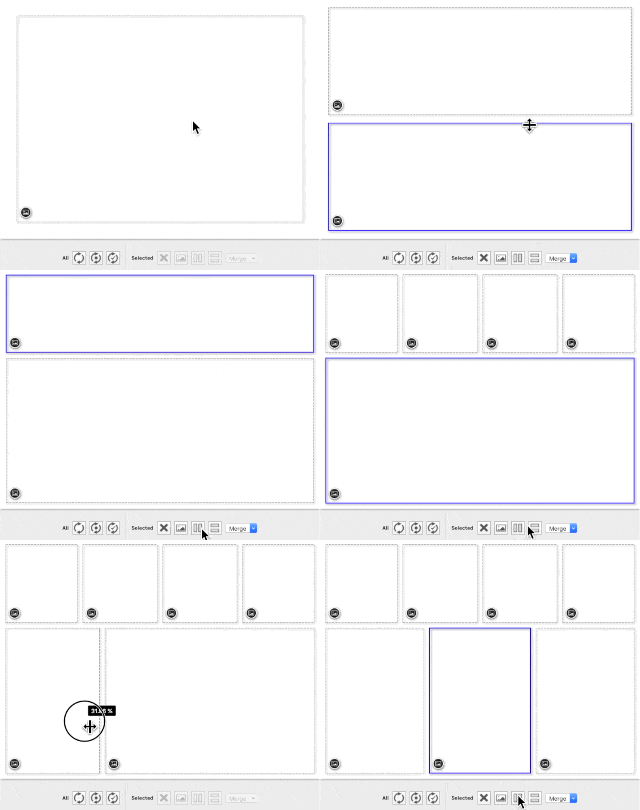
Here's a screenshot of TurboCollage after we've created the layout:
Step 3: Add Photos to Your Collage!
Let's bring your collage to life by adding seven photos to the layout we prepared in the previous step. Use the +/Add Pictures button to import pictures.
TurboCollage automatically places your images into the collage.
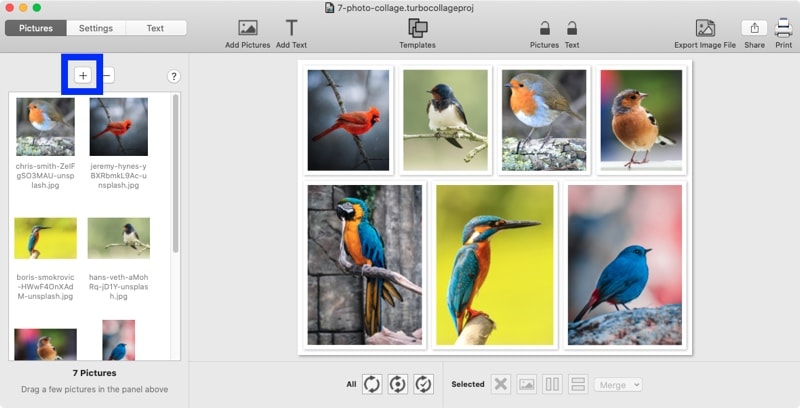
Step 4: Customize Your Collage for a Unique Look
Fine-tune your grid! Swap and switch photos effortlessly by dragging and dropping them between the cells.
Customize the background color, picture borders and shadows.
With TurboCollage's intuitive pan and zoom feature, you can ensure every picture fits perfectly within its designated cell. To pan or zoom an image, click to select it and then use the controls shown below:

Here's a detailed tutorial on building photo grids like those shown above.
Step 5: Export to JPG And Share With the World!
Once you're happy with your 7-photo collage, click the Export Image File button at the top right of the window. From here, you can share your seven-photo grid via email, on social media, or anywhere else you like!

The following 1-minute video demonstrates the steps above:
Options 4-5. Make a 7-Picture Grid of Rows and Columns
<<Index
This section will show you how to create 7-image grids with pictures in a fixed pattern of rows and columns.

Columns=7, Rows=1

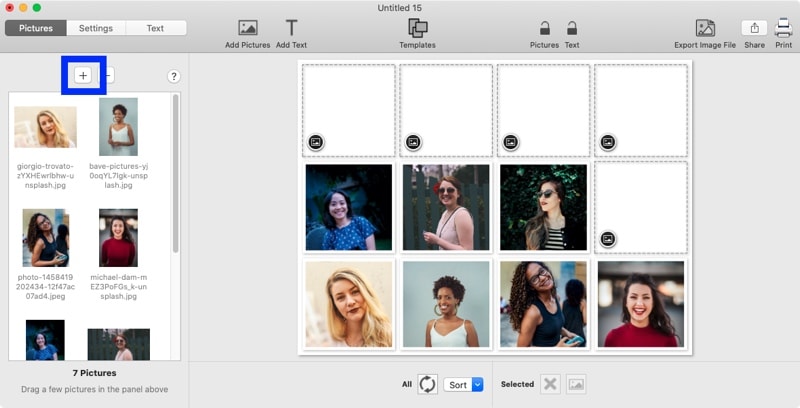
Set Columns=4, Rows=3, and keep five cells empty.
Step 1: Start Our 7 Photo Collage Maker
Launch TurboCollage and then choose the Picture Grid pattern under the Settings tab.
Select a collage size from the Size drop-down or use the Set Custom Size button to specify collage dimensions. Set collage orientation to Landscape or Portrait.
Set the number of Rows and Columns in your grid. In this example, we've set the number of rows to 3 and the number of columns to 4.
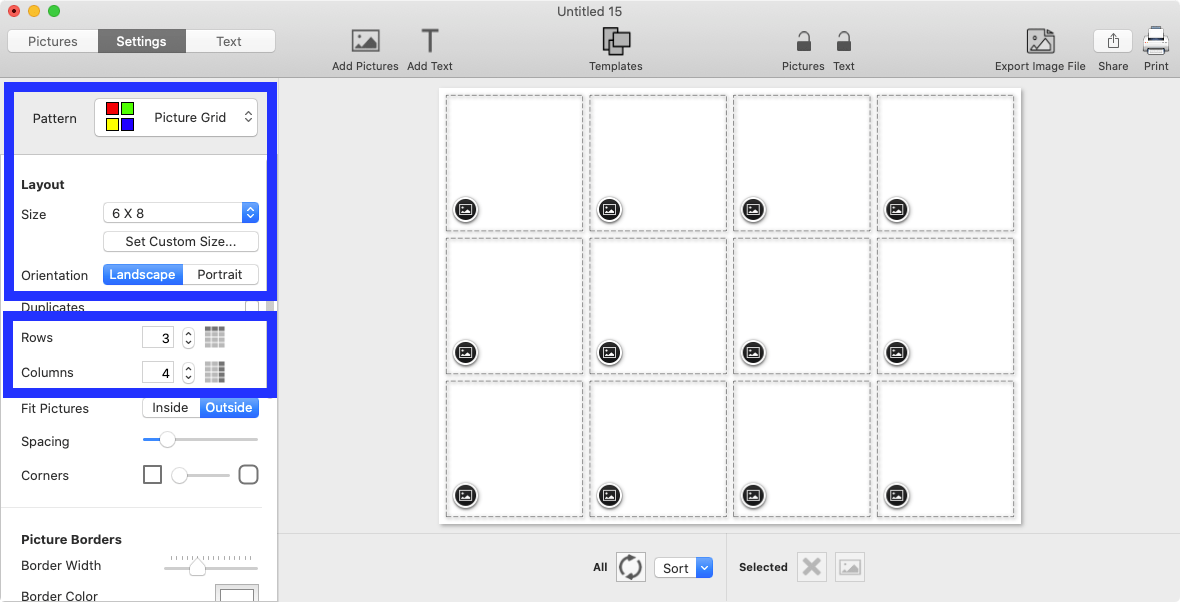
Step 2: Add 7 Photos
Next, visit the Pictures tab and click the +/Add Pictures button. Pick seven photos you want to include, and TurboCollage will place them into the blank cells in the grid.
The grid can have any number of rows and columns. We will add seven photos only and keep the rest of the cells empty. We've used 3 rows and 4 columns with five empty cells in the sample below.
Step 3: Personalize Your Grid
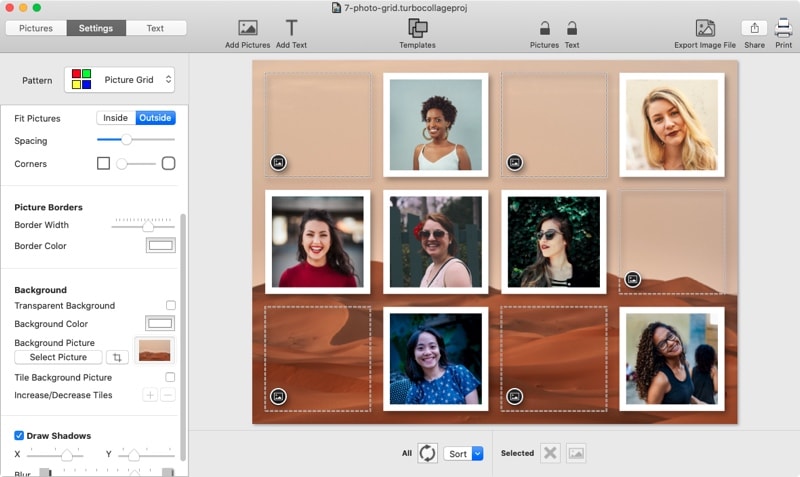
Once you've added the photos, you can rearrange them by dragging them from one cell to another in the grid.
In this example, we've used the picture of a desert as a background.
Check out this detailed tutorial to guide you through creating a customized photo grid.
Step 4: Export the 7 Photo Grid to JPG
Once your collage is complete, you can export it as a high-quality JPG, PNG, or TIFF image. From there, the choice is yours - you can easily email, print, or share the exported image on social media to showcase your artistic skills to the world.

Options 6-7. Design a 7-Picture Overlapping Collage
<<Index
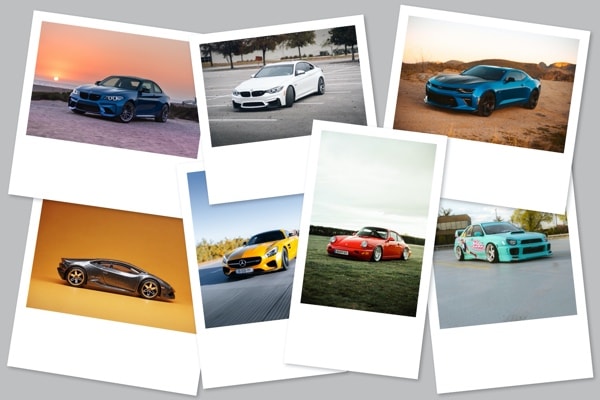
Let's learn to make the 7-photo collages shown below:


Step 1: Start TurboCollage
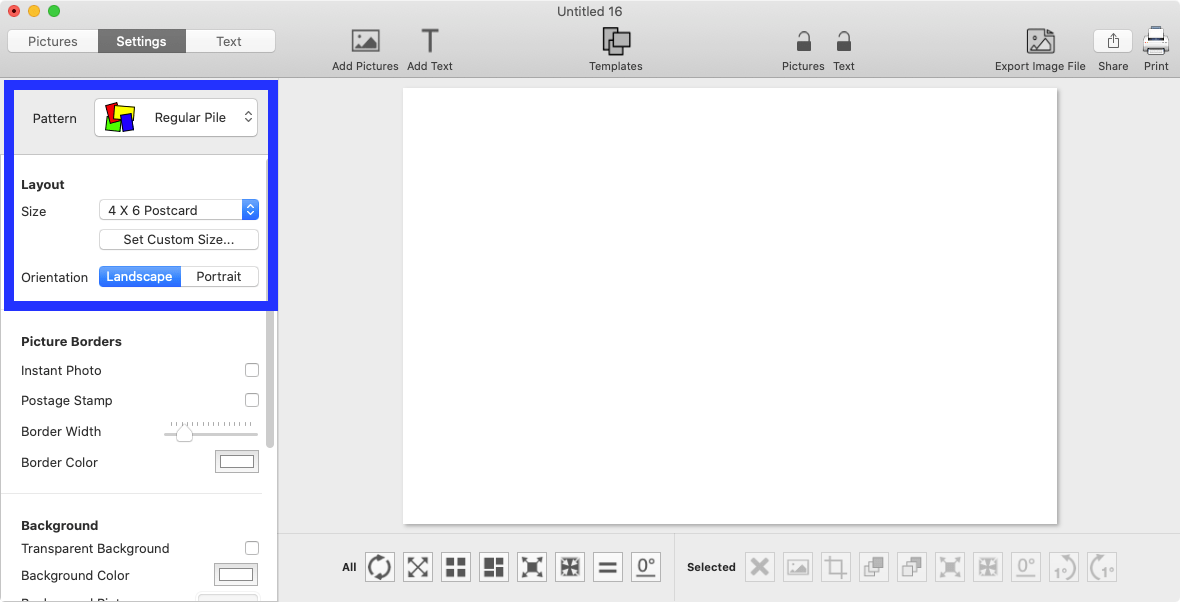
Open TurboCollage and then choose the Regular Pile pattern under the Settings tab.
Select a collage size from the Size drop-down or use the Set Custom Size button to specify collage dimensions. Set collage orientation to Landscape or Portrait.
For this example, we'll make a 4 X 6 Landscape collage.
Step 2: Add Photos
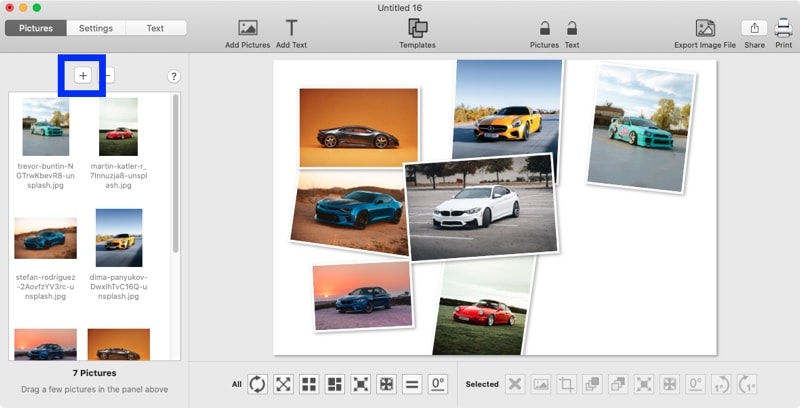
Next, visit the Pictures tab and click the +/Add Pictures button. Select seven photos you want to include, and TurboCollage will automatically arrange them into a picture pile.
Step 3: Personalize Your Collage Design
Move, rotate, resize, and change the stacking order of photos to get the collage design that you want.
In this example, we've also changed the background color to light gray and used an instant photo border.
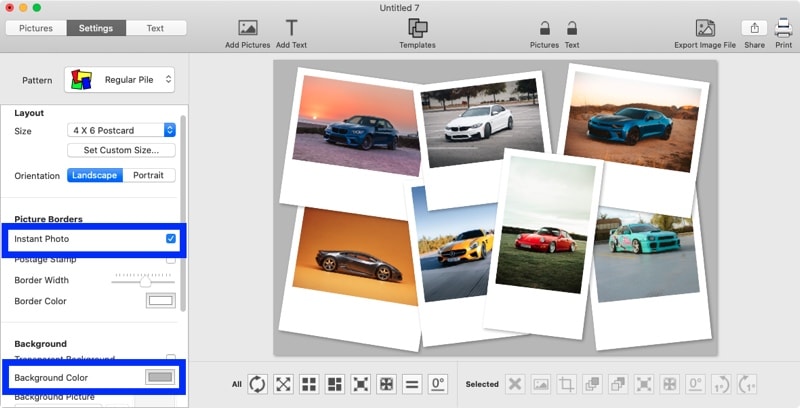
Here's a detailed tutorial on making overlapping photo collages.
Options 8-9. Make a 7-Picture Hexagon Collage
<<Index


Step 1: Start TurboCollage
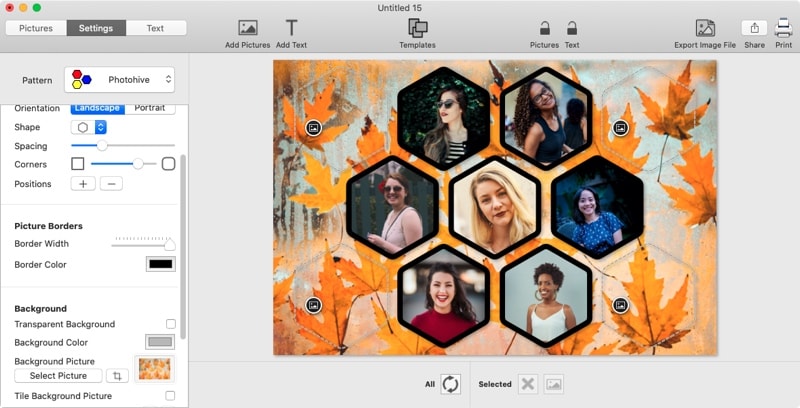
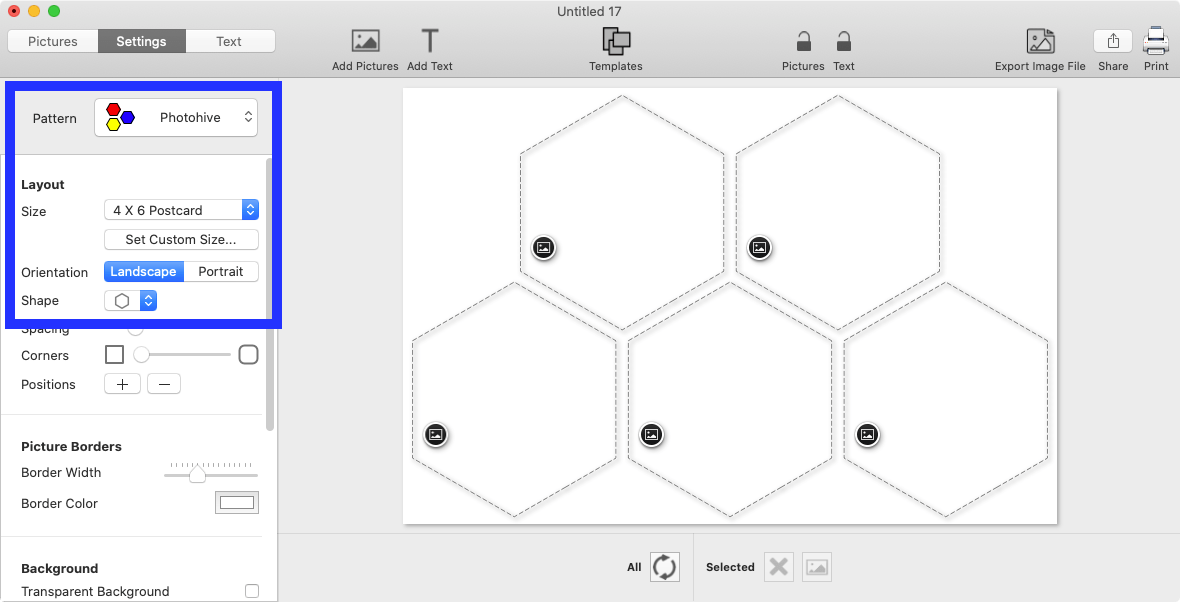
To begin, launch TurboCollage and then choose the Photohive pattern under the Settings tab. Select the Hexagon shape from the Shape drop-down.
Step 2: Add Photos
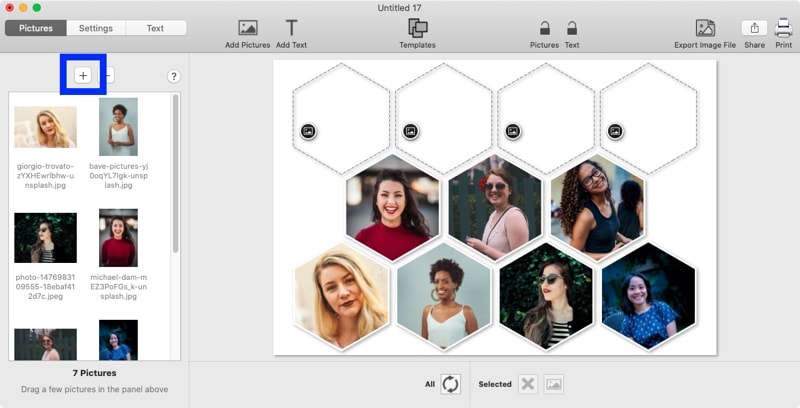
Next, visit the Pictures tab and click the +/Add Pictures button. Choose seven photos you want to include, and TurboCollage will automatically put them into a hexagon collage.
Step 3: Personalize Your Collage
Once you've added the photos, you can drag pictures from one hexagon cell to another.
In this example, we've used rounded corners on the pictures. We've also used a picture as the collage background.
Check out this detailed tutorial on making hexagon collages.
