How to Make a 6-Photo Collage in 30 Seconds

Get ready to up your photo game with our quick and easy guide to creating stunning 6-photo collages in 30 seconds! Say goodbye to tedious and time-consuming collage-making and hello to fun and impactful visual storytelling.
Our step-by-step instructions will guide you through creating not just one but fifteen different collages of 6 photos.
Table of Contents: 6-Photo Collage Options
- 1-4) Make a 6 Picture Grid
- 5-10) Make a 6 Picture Grid with Images of Varying Sizes
- 11-13) More 6 Picture Collages
- 14) Make a 6 Picture Zig-Zag Collage
- 15) Make a 6 Picture Circle Collage
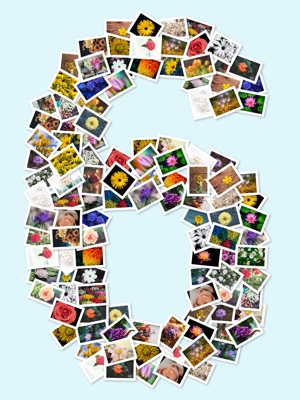
Are you looking to make a number 6 collage?
If you want to make a number 6 from your photos, you can make a number collage using our FigrCollage software.
But before you dive in, make sure you have TurboCollage on your device - It takes less than a minute to download and install!
Options 1-4. Make a 6-Picture Grid
<<Index
We will teach you how to create the six photo grids displayed below. These grids have one thing in common: the pictures are arranged in a set grid pattern of rows and columns.

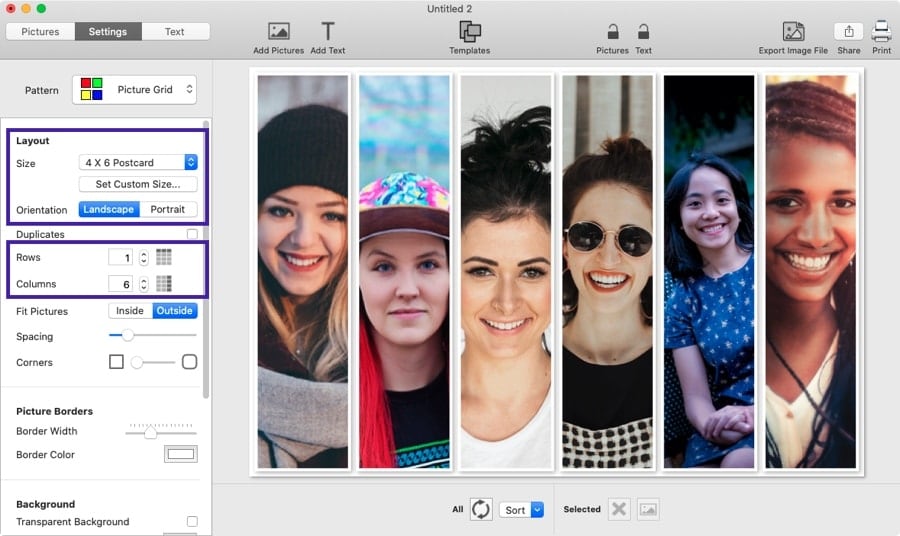
Columns=6, Rows=1

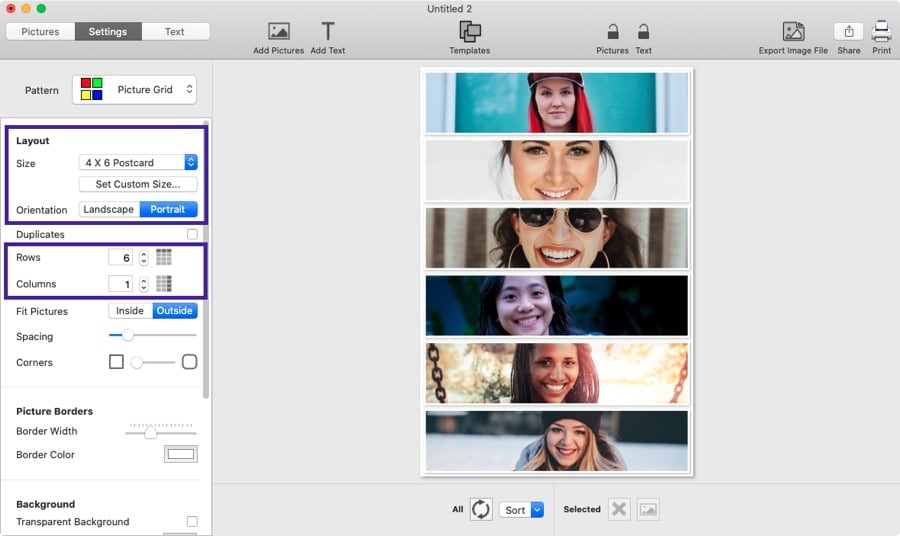
Columns=1, Rows=6
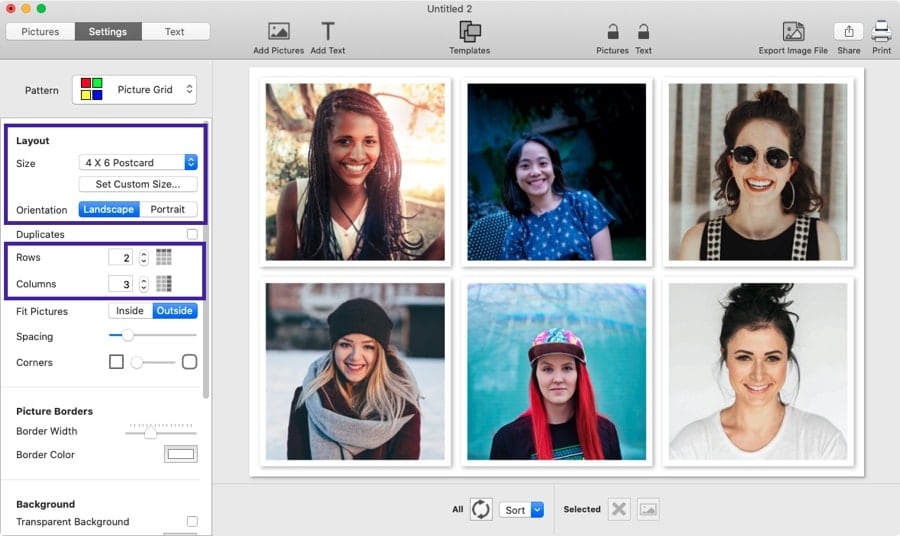
Columns=3, Rows=2

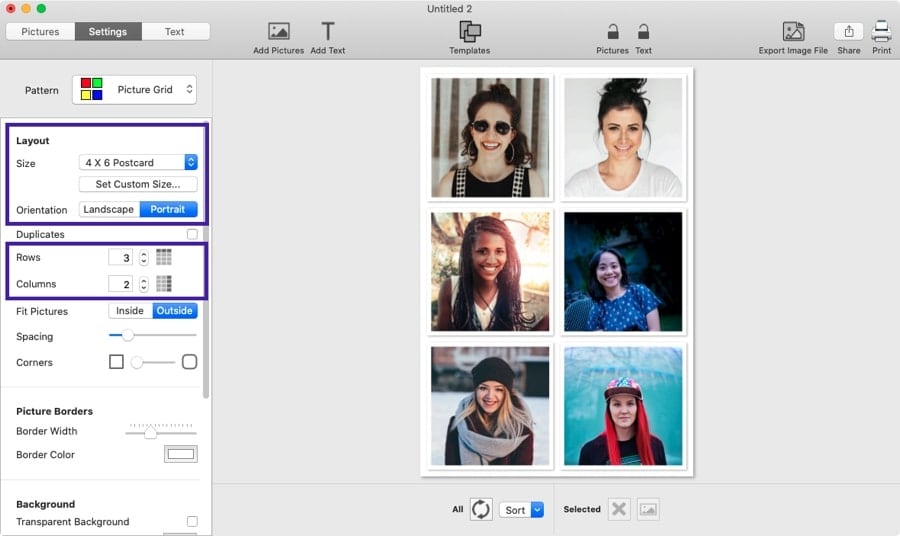
Columns=2, Rows=3
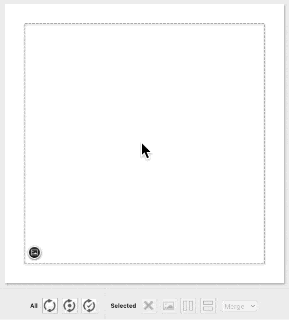
Step 1: Start Our 6 Photo Collage Maker
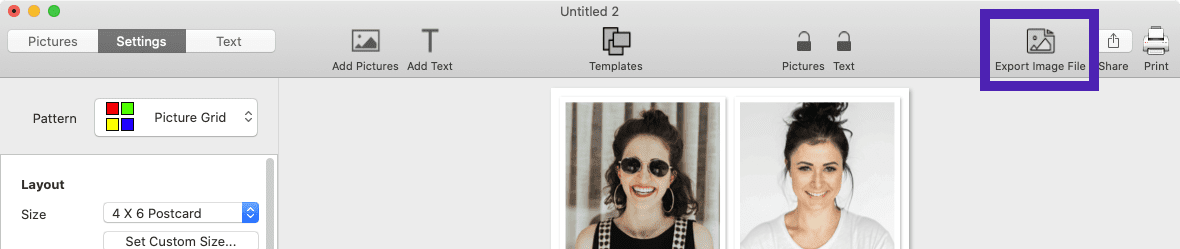
To begin, launch TurboCollage and then choose the Picture Grid pattern under the Settings tab.
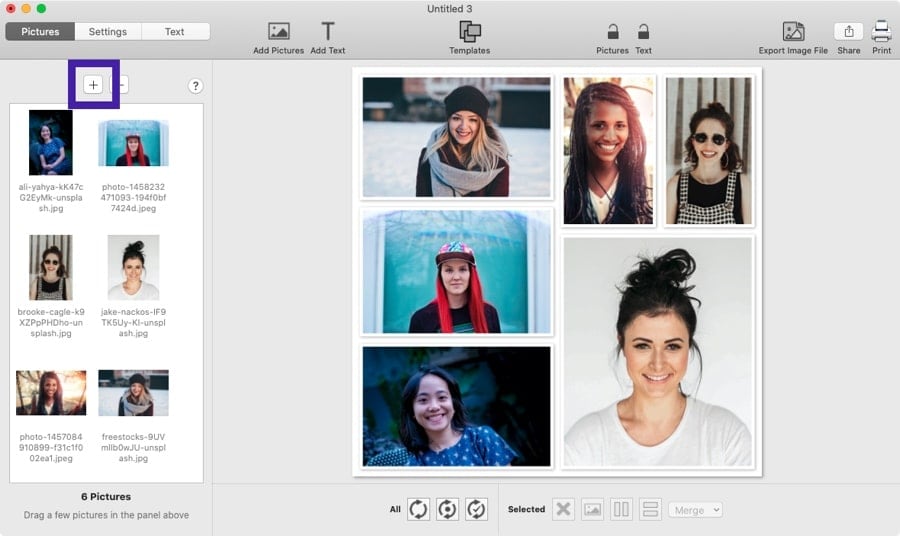
Step 2: Add 6 Photos
What's a collage without photos?
Next, visit the Pictures tab and click the +/Add Pictures button. Pick six photos you want to include, and TurboCollage will automatically arrange them in a 6-photo grid.
Step 3: Personalize Your Grid with a Custom Row and Column Layout
Achieve your ideal grid layout by customizing the number of rows, columns, and collage size to your preference.
Take a look at this screenshot featuring a 1-row, 6-column design and a 4 X 6 landscape collage size for a sneak peek of the possibilities.
Take a look at this snapshot of TurboCollage showcasing a 2-row, 3-column grid layout complemented by a 4 X 6 landscape collage size:
Now, check out this TurboCollage snapshot showcasing a stunning 6-row, 1-column grid layout with a portrait-oriented 4 X 6 collage size - perfect for when the subject of your photos fits neatly in a horizontal window:
But what about even squares in portrait orientation? You can do that too. Here we've set rows to 3, columns to 2, and the collage size to a 4 X 6 portrait.
If you'd like to modify the appearance of your 6-photo grid further, you can adjust the background, picture borders, and other settings. Check out this detailed tutorial that will guide you through creating a customized photo grid.
Step 4: Export the 6 Photo Grid to JPG
Once your collage is complete, you can export it as a high-quality JPG, PNG, or TIFF image. From there, the choice is yours - you can easily email, print, or share the exported image on social media to showcase your artistic skills to the world.
Options 5-10. Make a 6 Picture Grid with Images of Varying Sizes
<<Index
This tutorial will teach you how to create the 6 photo collages displayed below:


Step 1: Start Our 6 Photo Collage Maker
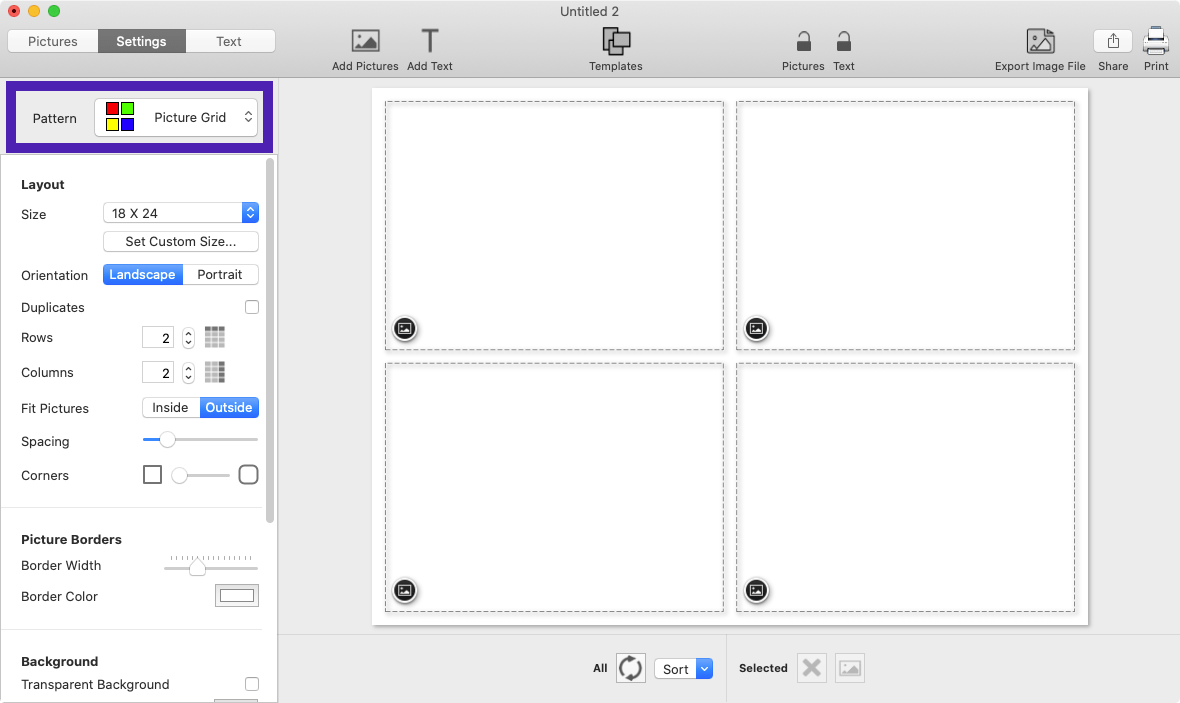
To get started, launch TurboCollage and choose the Picture Grid (Unequal) pattern under the Settings tab. In this demo, we will use a square output size for our collage; you can set any size you want.
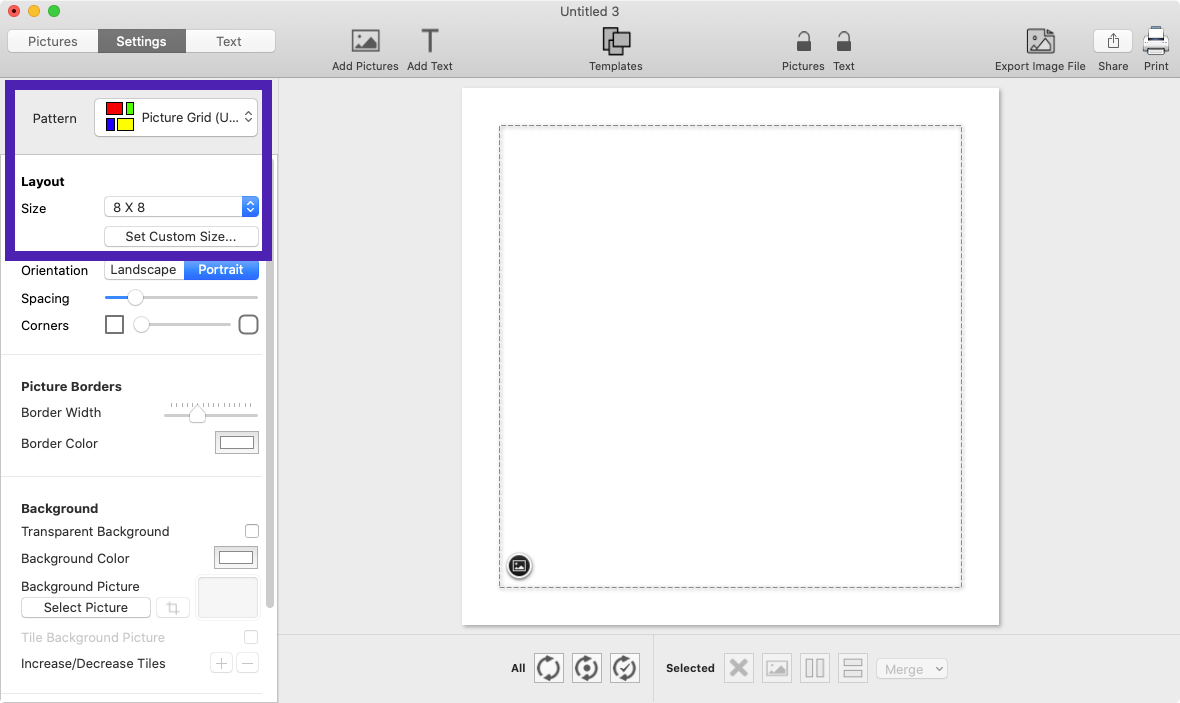
Step 2: Build the 6-Photo Grid Layout
Let us now build the following 6 photo grid layout. You can use the steps in this section to make a range of 6-picture layouts, so play around and see what works for you.
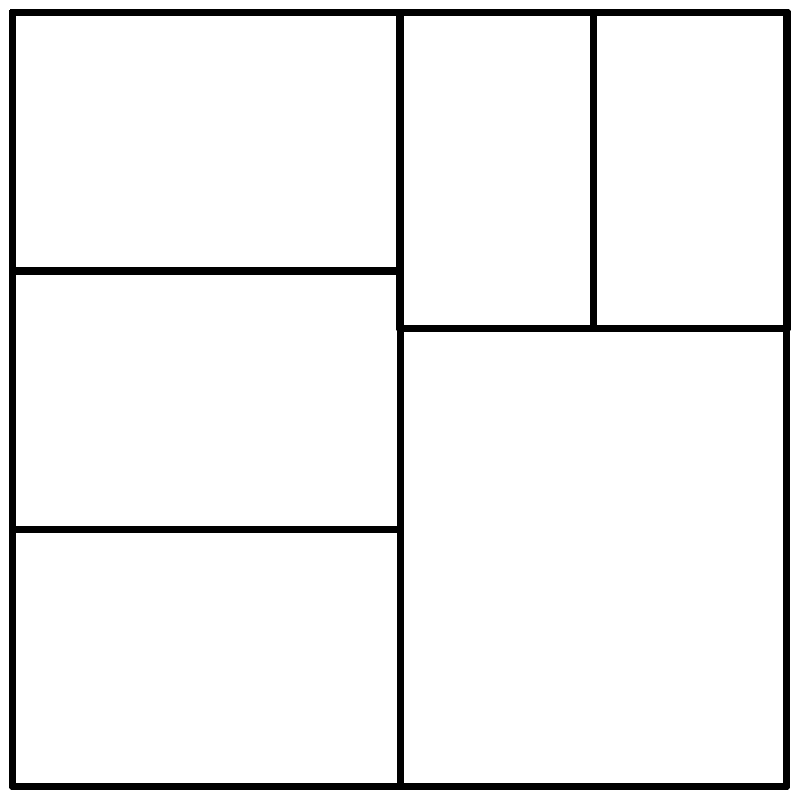
The splitting tools located at the bottom of the TurboCollage window will help us build the layout quickly and easily.
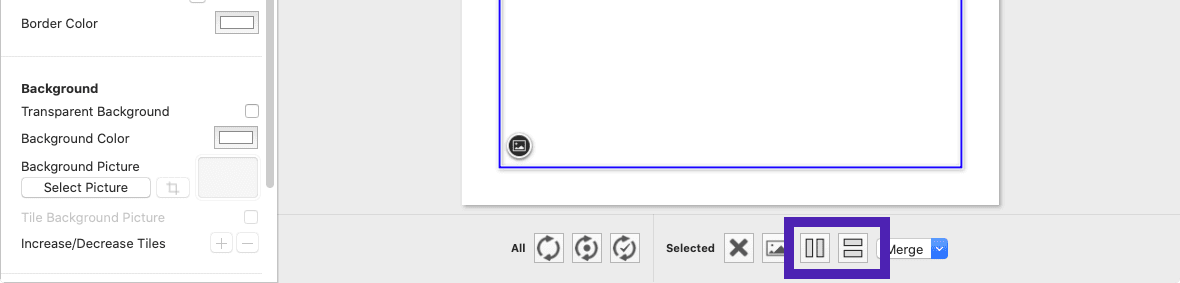
It's simple! You can use the splitting tools to build the 6 picture grid layout like shown in the screen recording below:
Step 3: Add Photos to Your Collage!
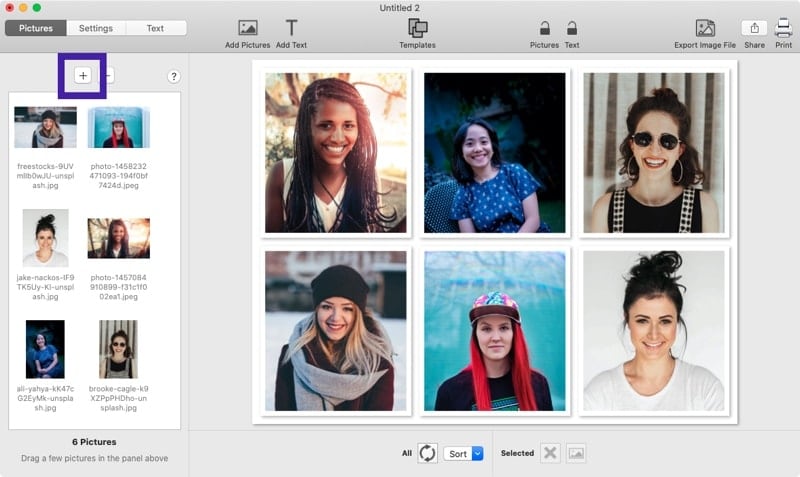
Let's bring your grid to life! Add six eye-catching photos to your stunning layout that we crafted in the previous step. You can use the +/Add Pictures button to import pictures.
TurboCollage intelligently places your images into the grid without any fuss. But hey, don't stop there! The real fun begins in the next step, where you can unleash your creativity and customize your design.
Step 4: Customize Picture Placement For a More Striking Look
Don't settle for a lacklustre grid! Instead, swap and switch your photos effortlessly by dragging and dropping them between the cells. With TurboCollage's intuitive pan and zoom feature, you can ensure every picture fits perfectly within its designated cell.

Here's a detailed tutorial on building photo grids with images of varying sizes.
Step 5: Export to JPG And Share With the World!
Once you're happy with your 6-photo collage, click the Export Image File button at the top right of the window. From here, you can share your six-photo grid via email, on social media, or anywhere else you like!

The following 1-minute video illustrates the steps above:
Options 11-13. Endless Possibilities - More 6 Photo Collages
<<Index
Let's learn to make the 6 photo collages shown below:


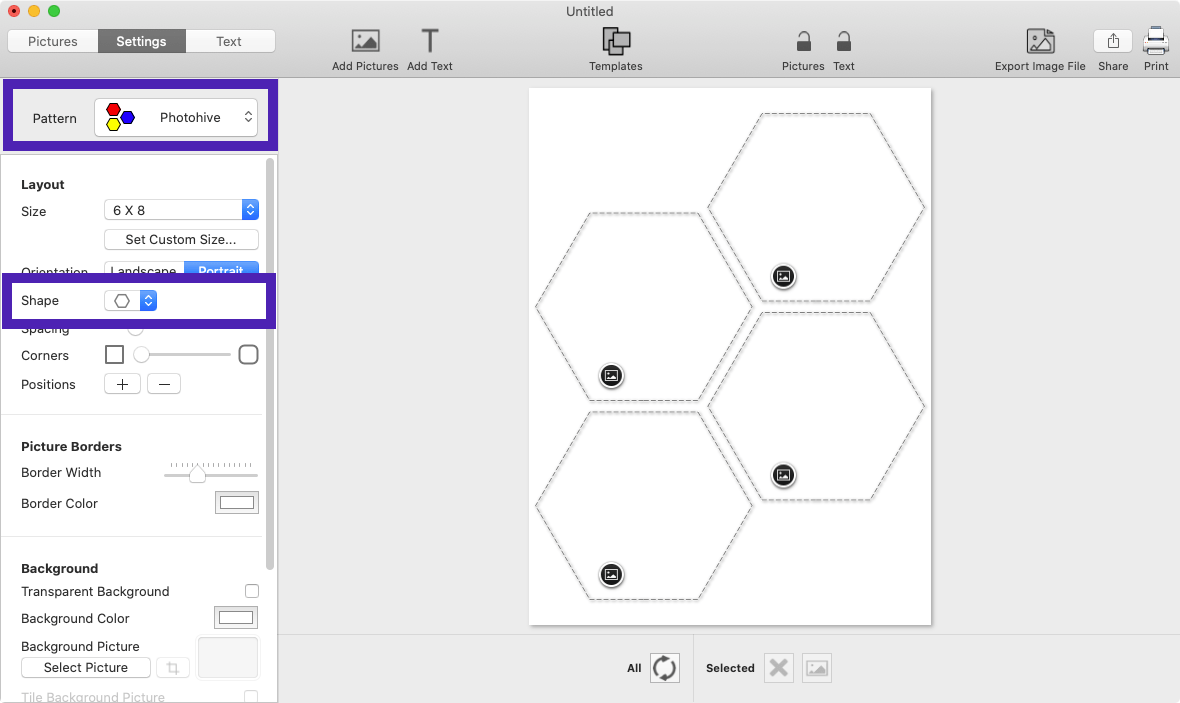
Step 1: Launch TurboCollage
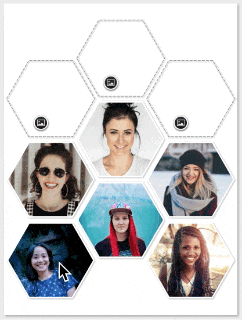
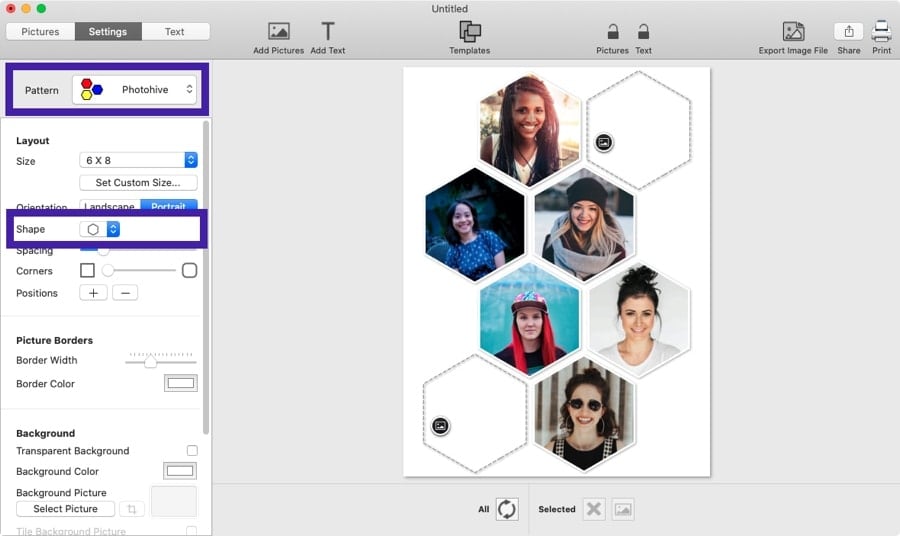
Open TurboCollage, and select the Photohive pattern from the Settings tab. Next, choose Hexagon from the Shape menu.
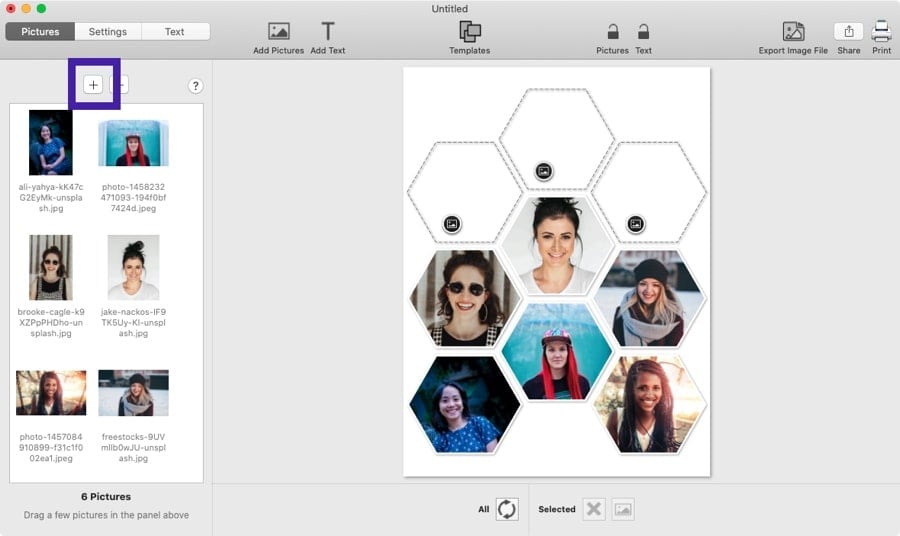
Step 2: Add Photos
Now it's time to add some substance to your collage. Choose six photos you want to include, and TurboCollage will do the rest. Its intelligent algorithm automatically arranges the pictures into an aesthetically pleasing hexagon collage. So get ready to see your photos come together in a beautiful and seamless display.
Step 3: Move Pictures to Your Desired Hexagon Layout
Not happy with the design? Move pictures around to achieve the picture placement you want.
Step 4: Pan and Zoom Pictures
Want to highlight a specific part of your image? Simply use the Pan and Zoom features so your photos fit more neatly within the hexagon shape.

Step 5: Use the Hexagon Shape with Pointed Top
Did you know that the Photohive pattern offers not one but two unique options for the Hexagon shape? In addition to the layout above, another option points the hexagons upwards.
Use this second shape option and Photohive pattern to make another exciting 6-photo hexagon collage.
Click here for a more detailed look at how to make a hexagon photo collage.
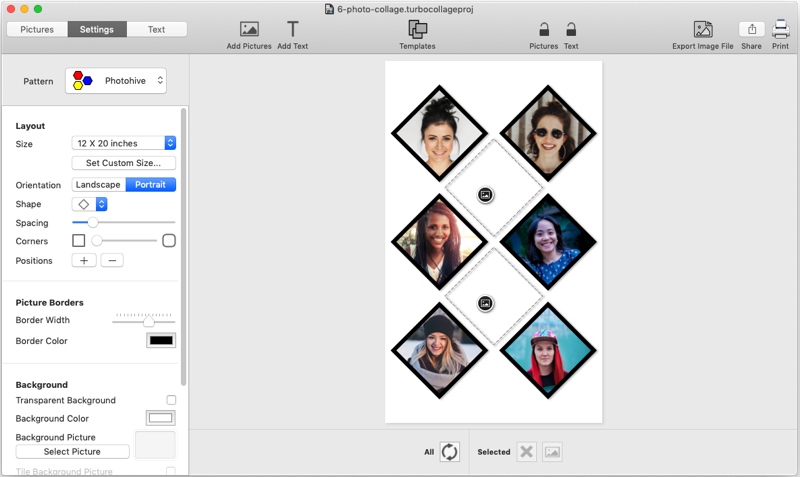
Step 6: Use the Diamond Shape
Like the hexagon, but want to try something a little different? Why not try the diamond shape? Select the Photohive pattern from the Settings tab, then choose Diamond from the Shape menu.
Click here to learn to make a diamond photo collage in more detail.
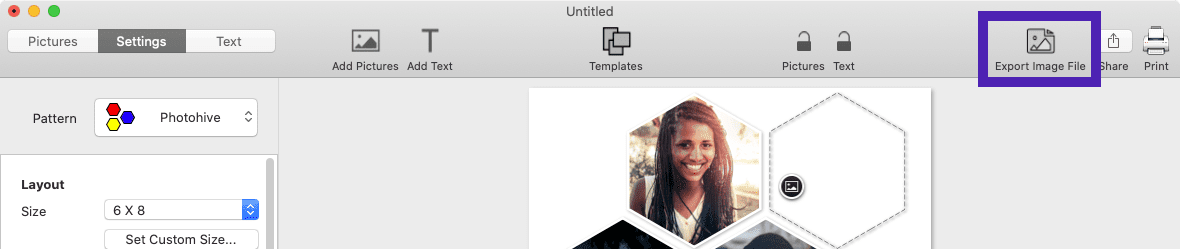
Step 7: Export the 6 Picture Collage to JPG
Time to share your masterpiece with the world! Export your collage to a high-quality JPG image that can be printed or shared effortlessly.
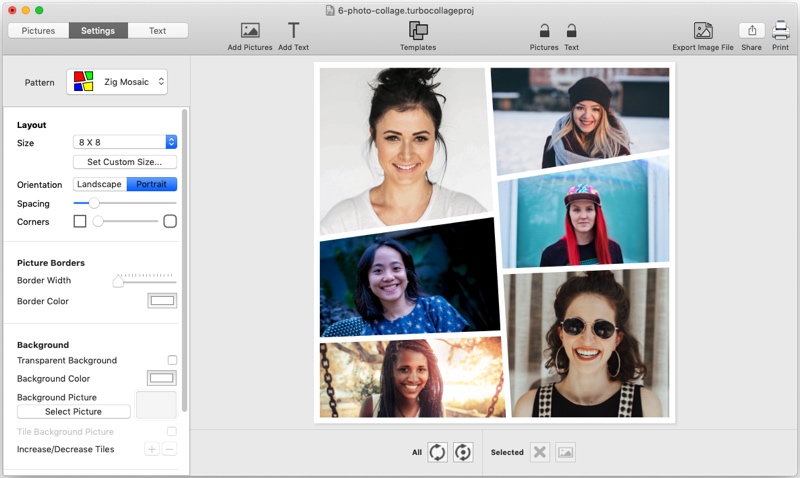
Option 14. Make a 6 Picture Zig-Zag Collage
<<Index
Making a 6-photo Zig-Zag collage works much the same way as the other examples on this list. You launch TurboCollage, add your photos, navigate to the Settings tab, and select the Zig-Zag pattern. You can customize the orientation, borders, background, collage size, and more to craft the perfect look.
Learn to make a zig-zag photo collage in more detail.
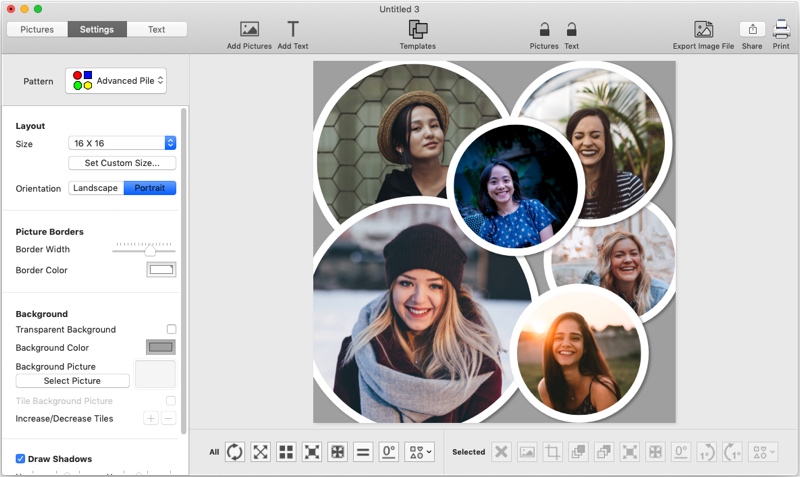
Option 15. Make a 6 Photo Circle Collage
TurboCollage offers multiple options for circle collages, allowing you to create a unique design that suits your needs. To learn how to make a circle collage in detail, follow our step-by-step tutorial that will guide you through the process. In the meantime, check out one of the variations in the screenshot below for inspiration. With TurboCollage, the possibilities are endless!